About
THE SCENE
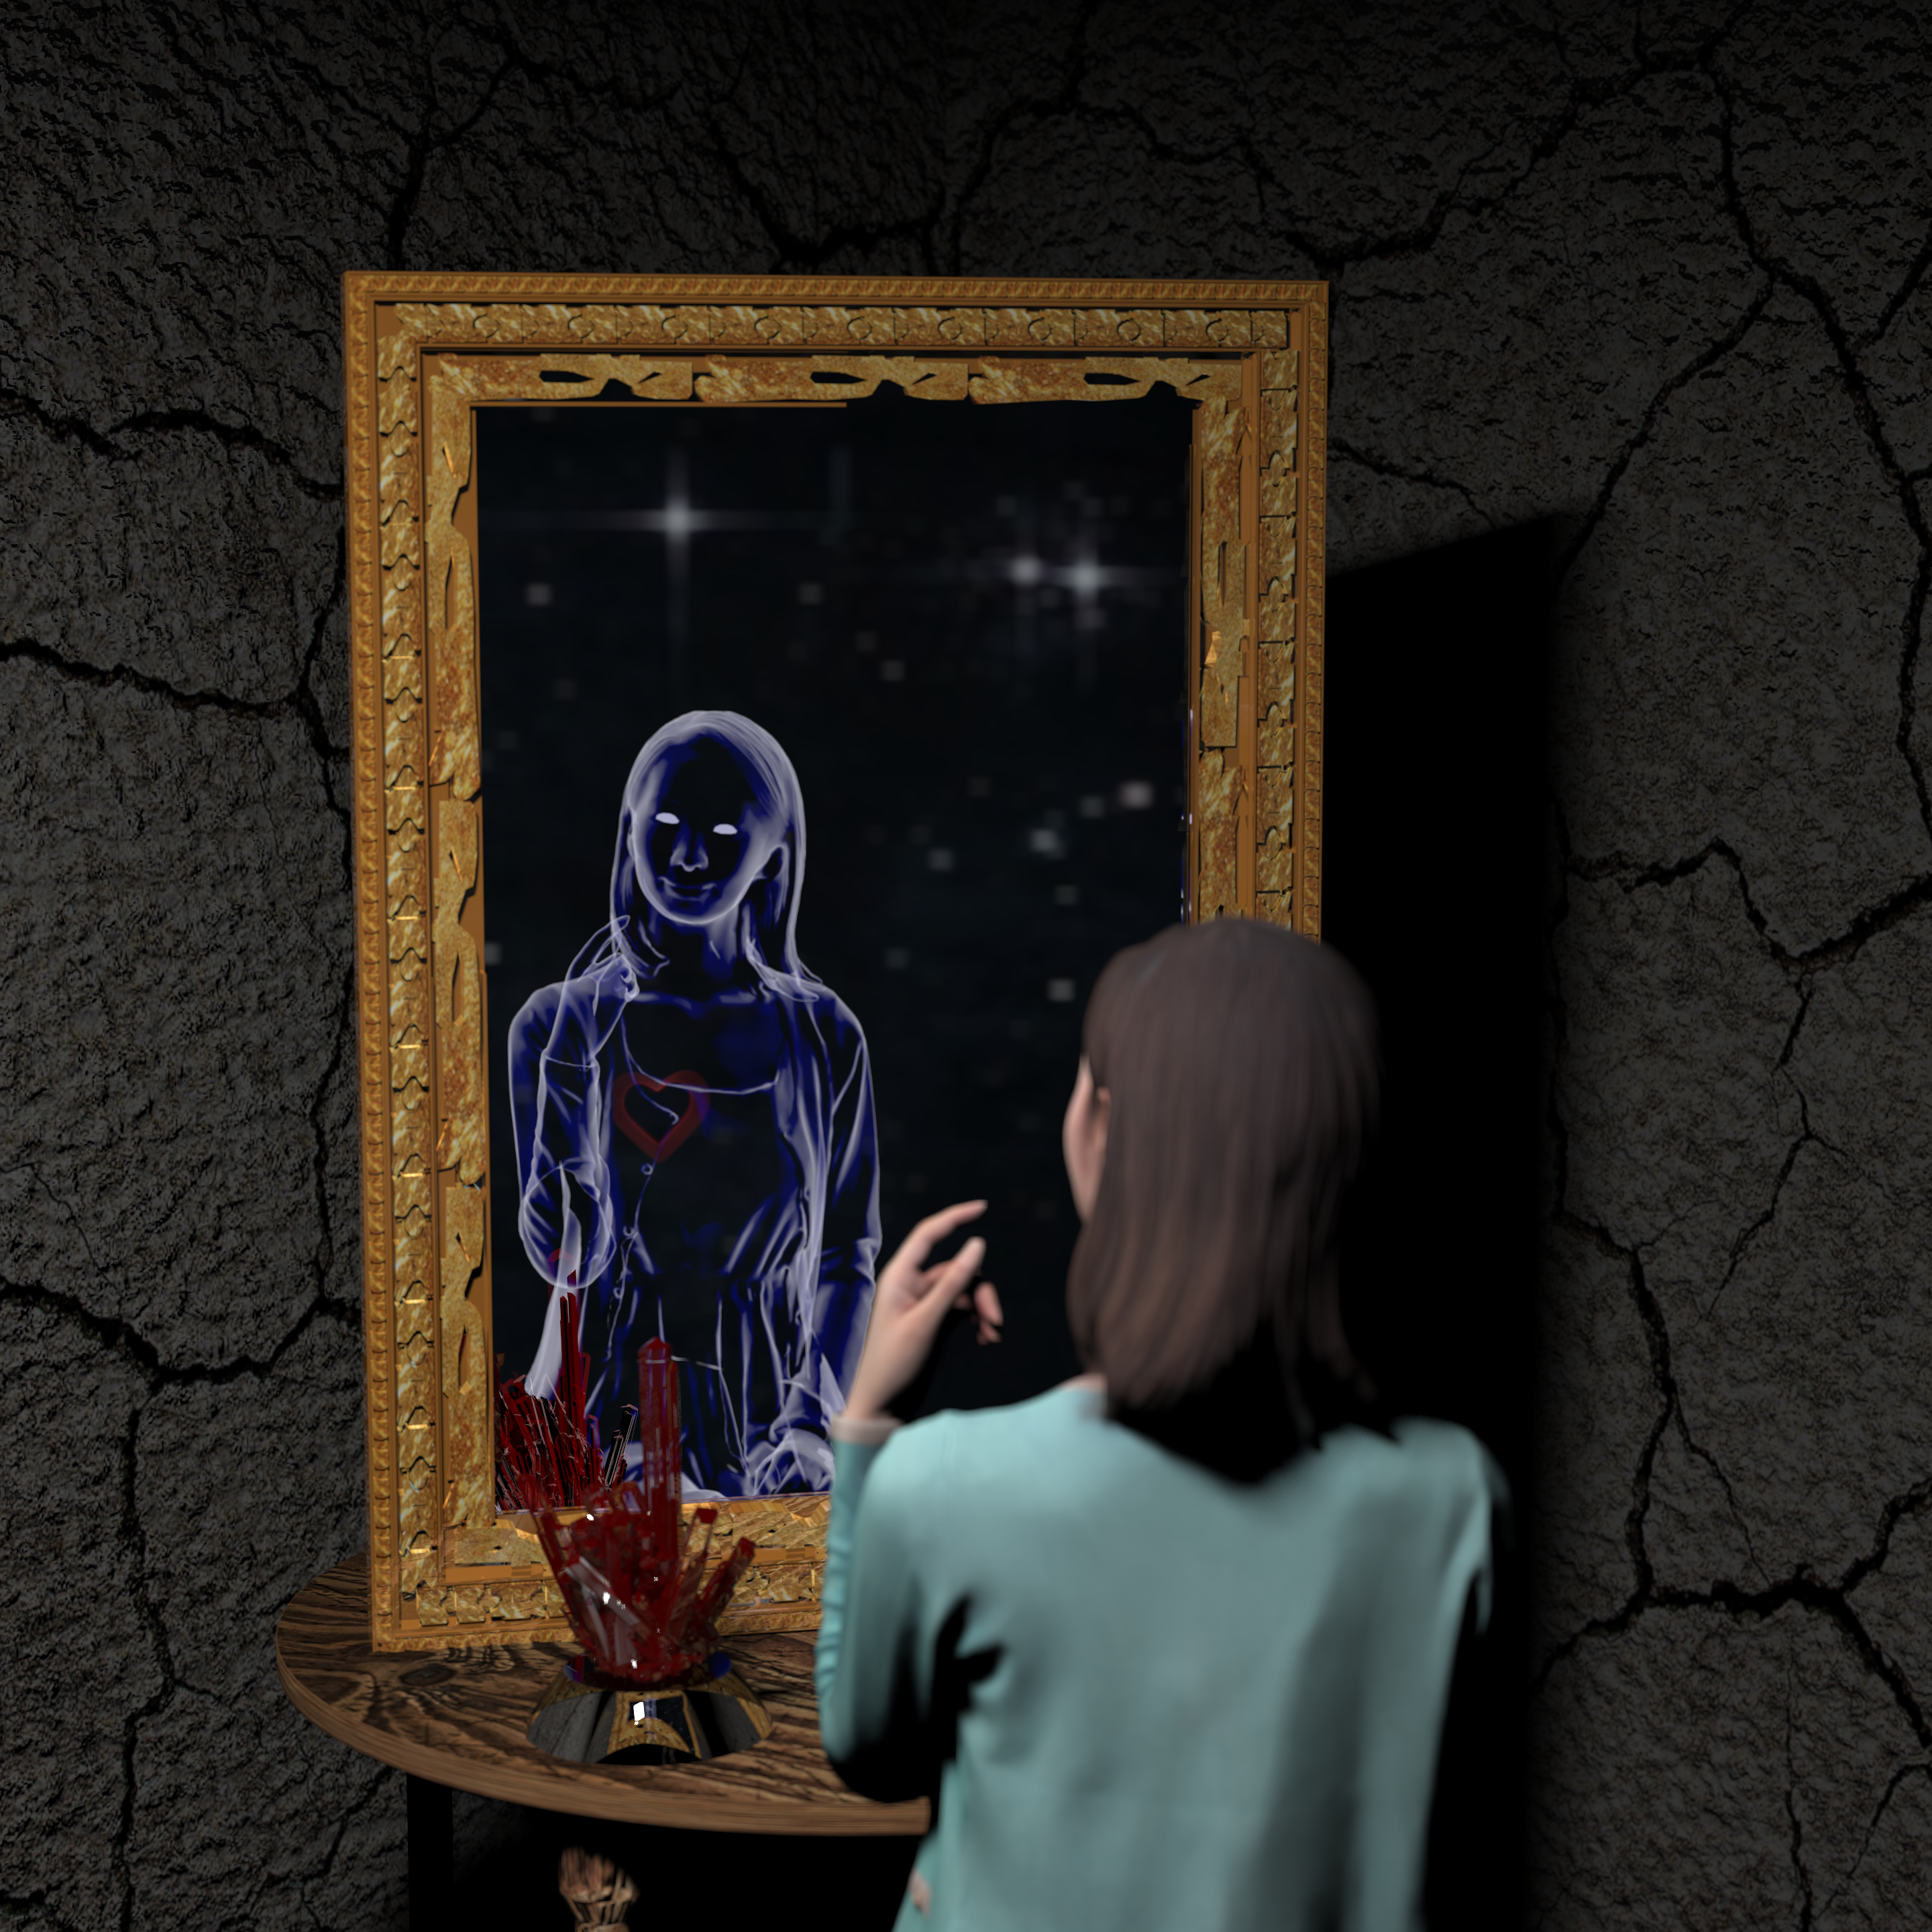
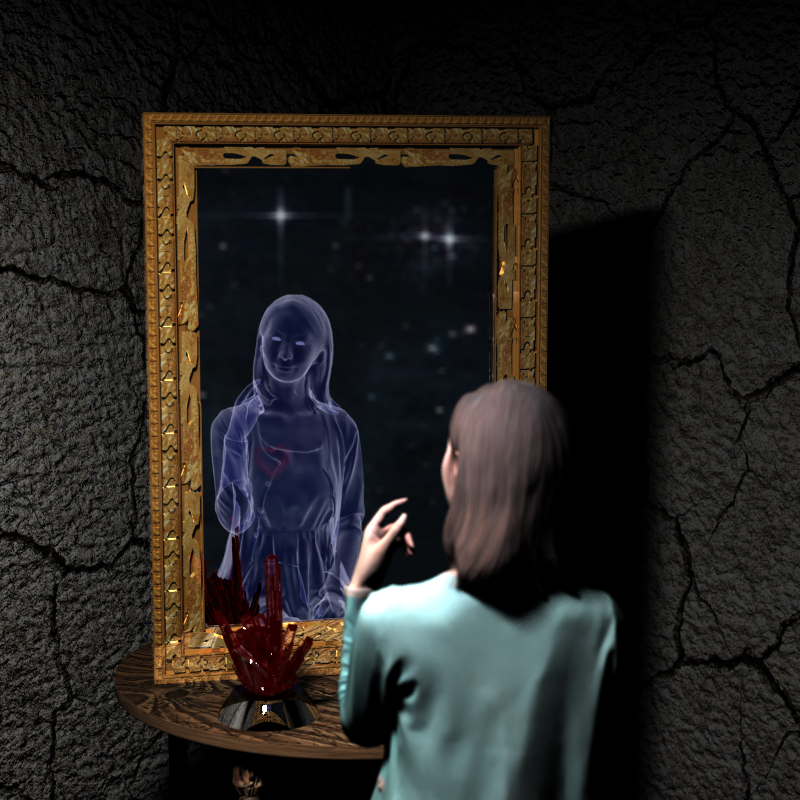
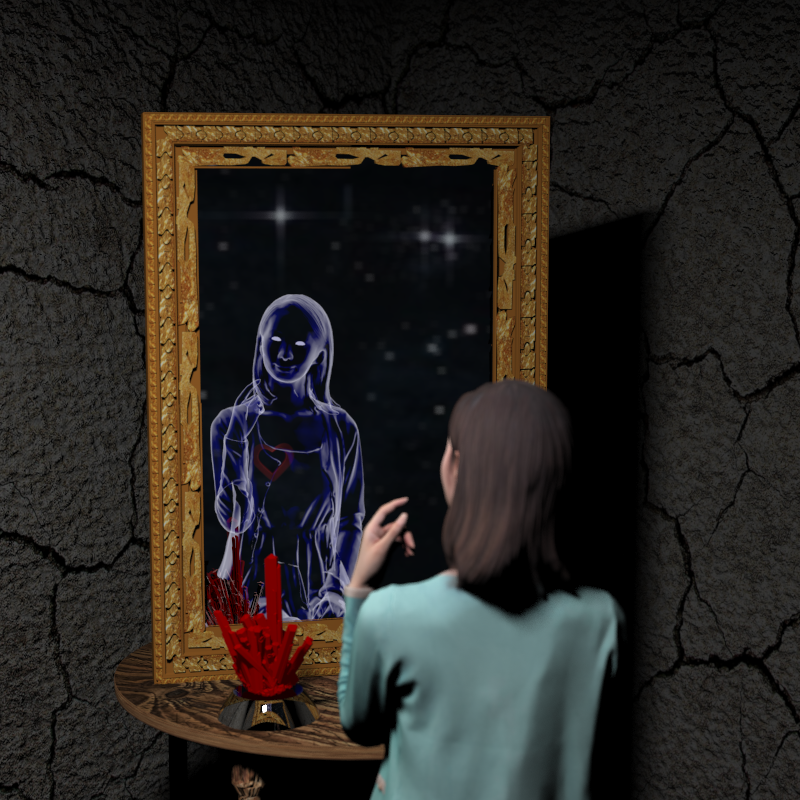
While exploring an old dilapidated basement, the Japanese girl Aya finds a mystic golden frame at some corner. Taking a closer look, she finds out that it is actually a mirror - but not an usual one. Instead of seeing herself, she sees her ghost mystically smiling at her. What is this creepy mirror and how did it get there? Nobody knows.
Making of
How did we come up with this idea?
While implementing the glass material, things went wrong at first, creating a spooky-looking sphere floating around. So we came up with an idea: how would it look like if we would implement a ghost material? After some work, the ghost material worked quite well and looked even better than expected, so we decided to use it for the rendering competition. Our first idea had been to create a scene with a ghost dragon sitting on a stone in a lake at night. However, the result hasn't been really convincing, as the ghost required a pretty dark scene, and with such few light only we would have not been able to showcase our raytracer's performance. Addressing this issue would be possible, if we could combine two different worlds within one scene: a dark one with a ghost and a more bright one without, which made us finally coming up with the "Soul Mirror" scene.
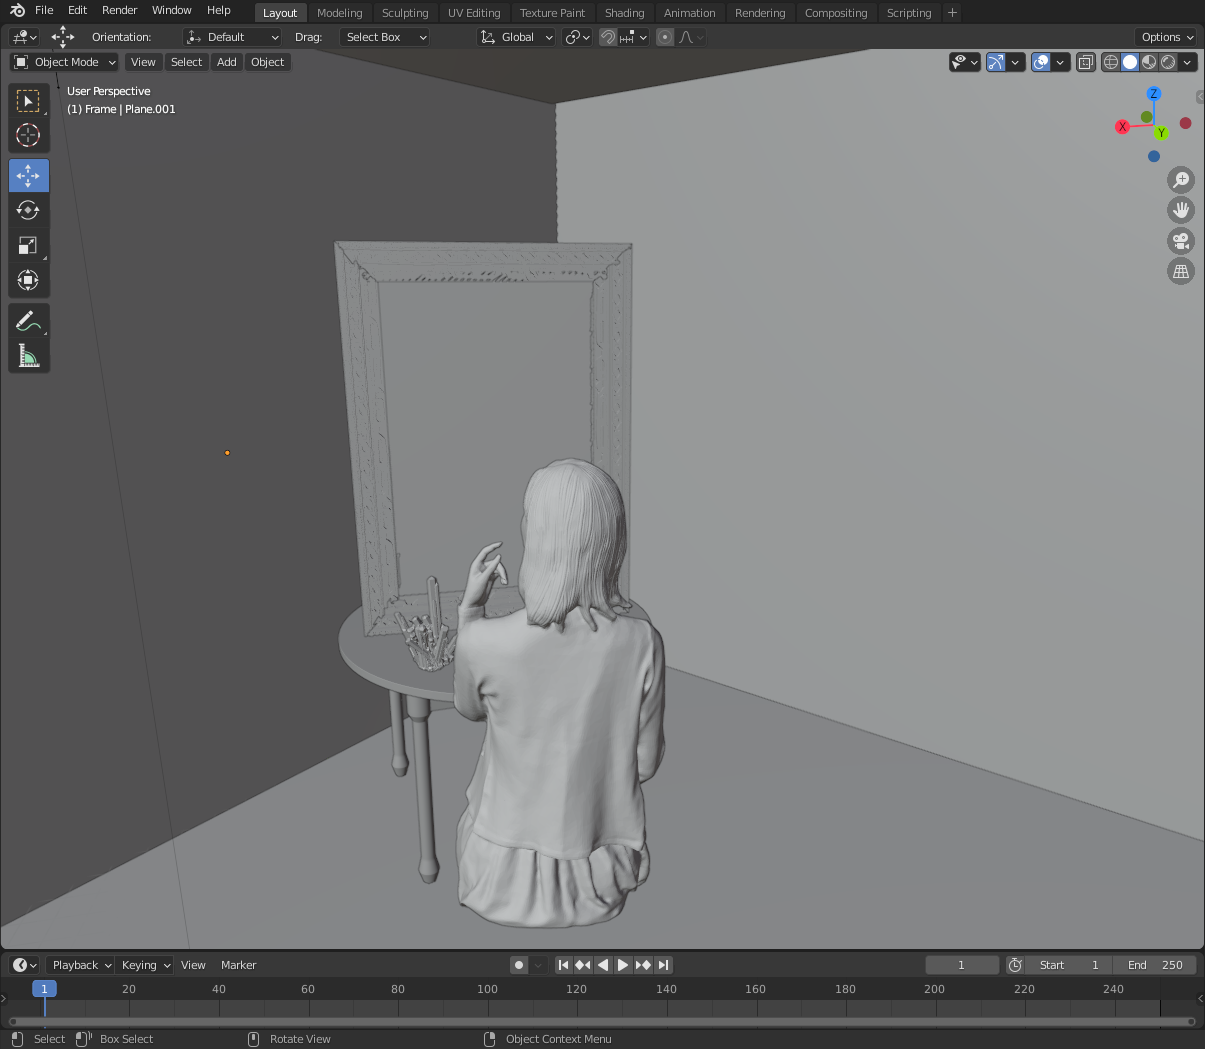
We built the scene in Blender using 3D-models from Free3D for the table, Aya, the frame and the crystal.
Highlights
Highlights
Ghost
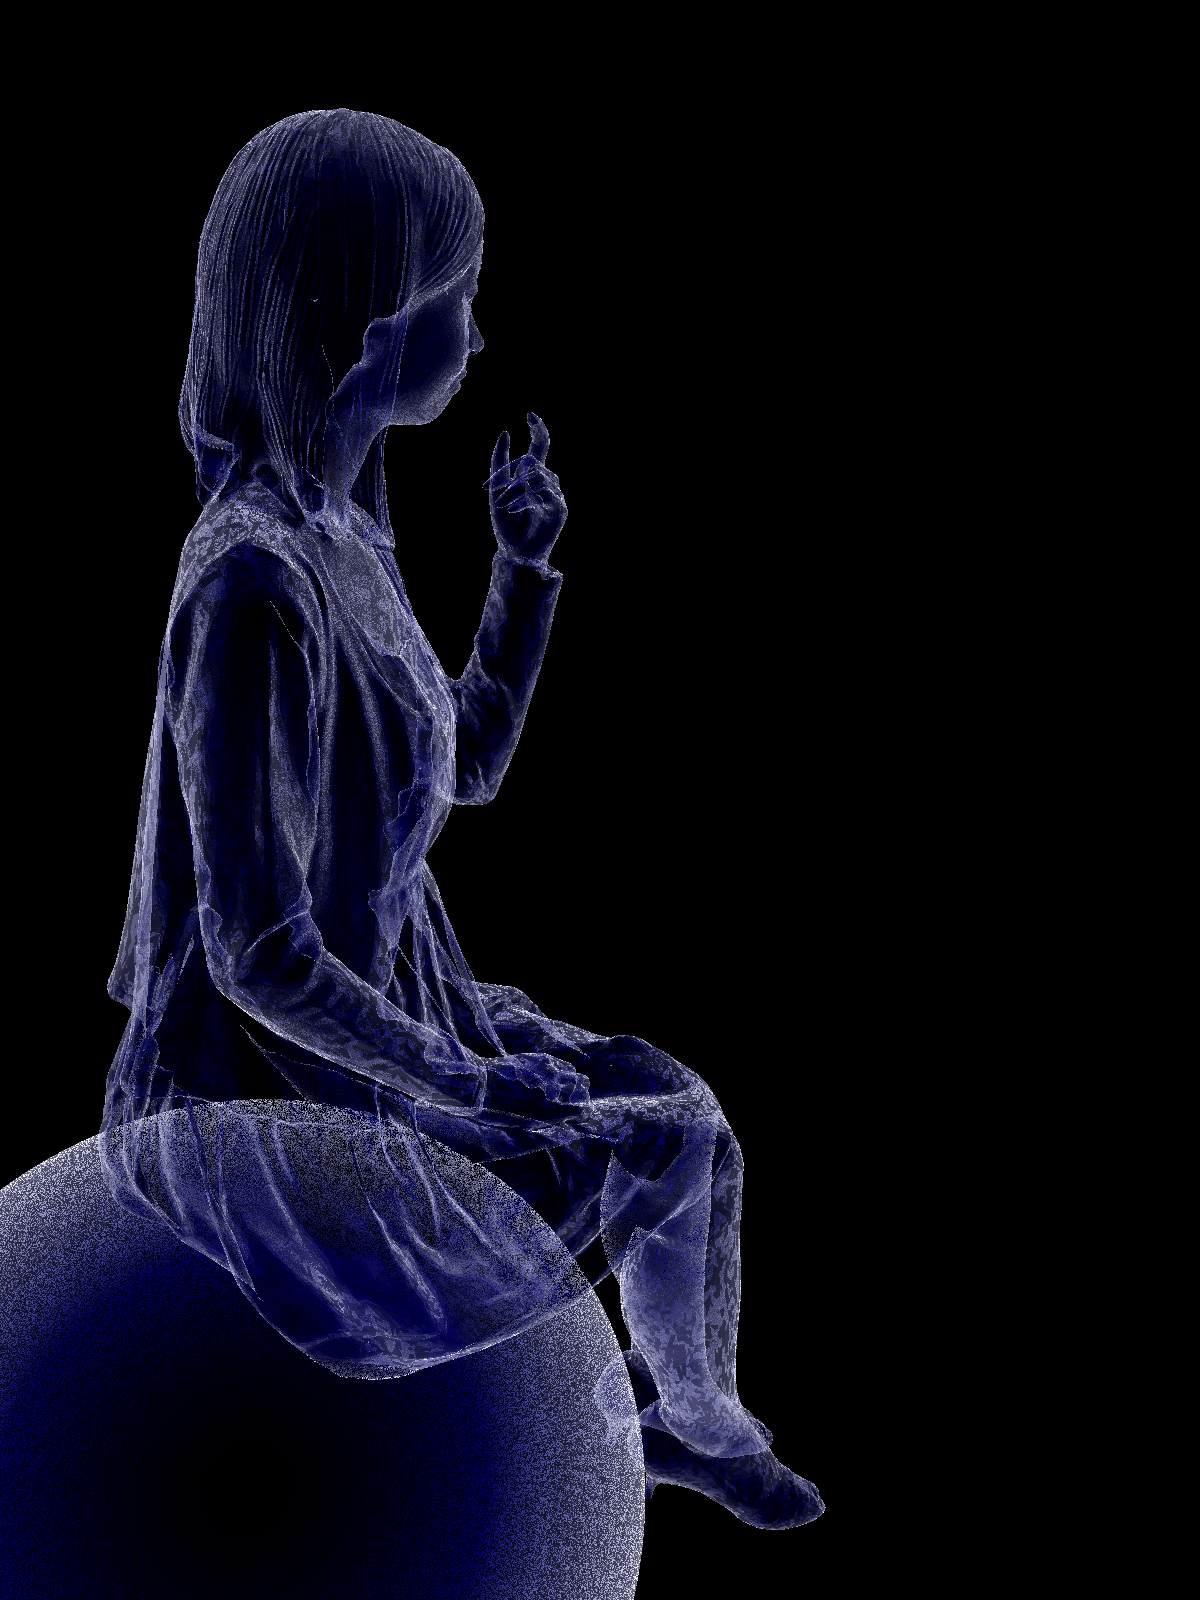
In our imagination a ghost should be somehow transparent and kind of glowing itself. As transparent objects like glass transmit more light if a ray hits them perpendicular to the surface, and reflect more light if the ray hits them at a shallow angle, we designed the ghost material based on this principle: we calculate the amount of the transmitted/emitted light based on the cosine between surface normal and ray direction. In addition has the ghost material a color assigned to it. This color does also control how "visible" the ghost is. Based these two parameters the angle and the color, the amount of emitted light is calculated. To get the amount of transmitted light, we subtract the amount of emitted light from the full intensity: this creates the effect of the background "shining through" the ghost. To avoid making the inside of the model visible, we do not emit any light if the object is hit from the inside.
The ghost material is implemented in the files materials/ghostmaterial.h and materials/ghostmaterial.cpp
For creating the glowing eyes, we used Blender to model them additionally. This allowed us to add them separately to the scene and to have them assigned another material. We actually used the flat material for them.
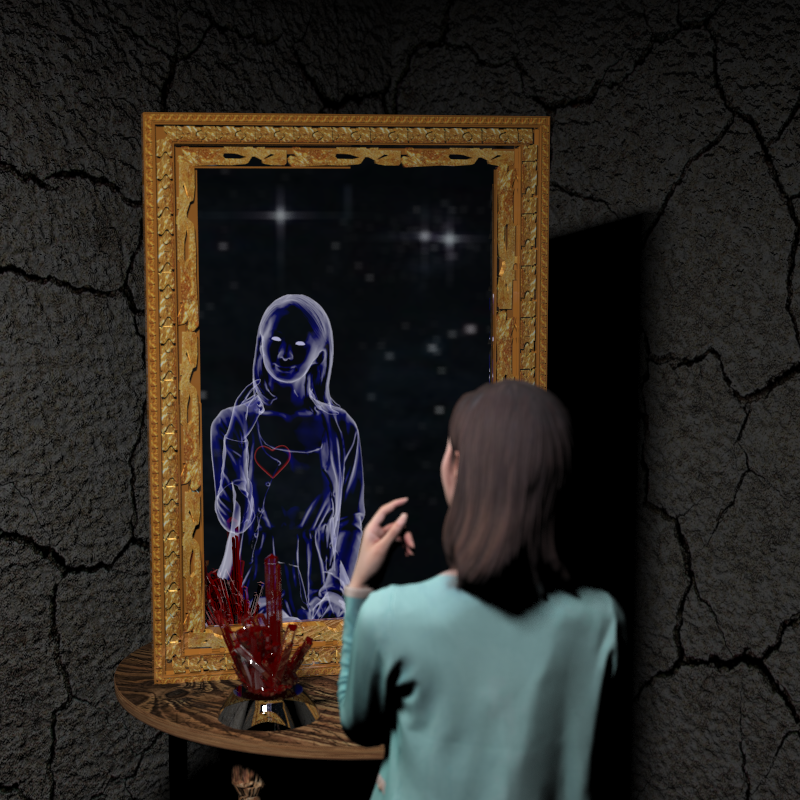
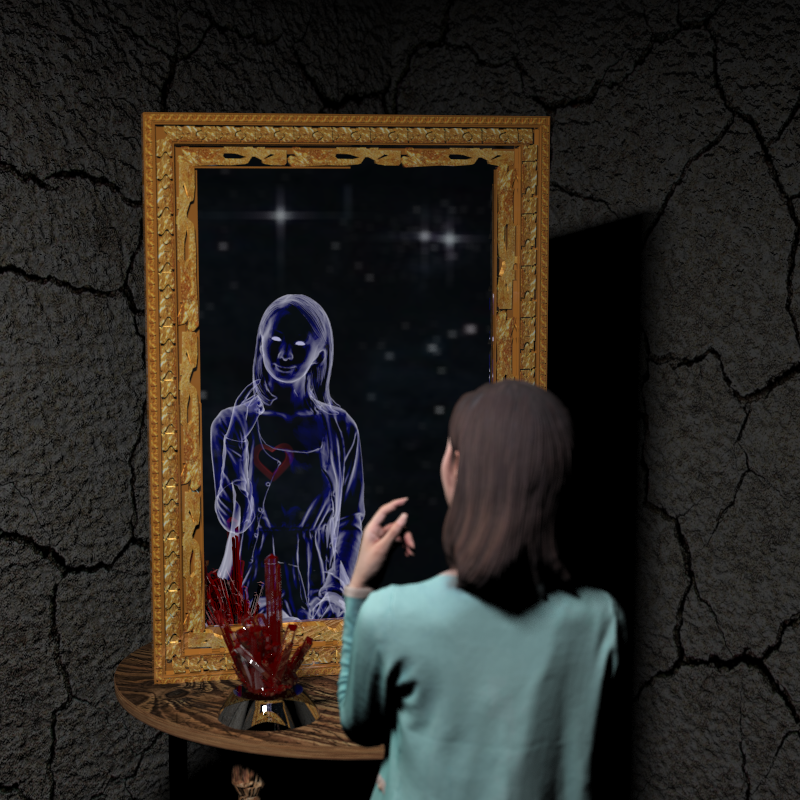
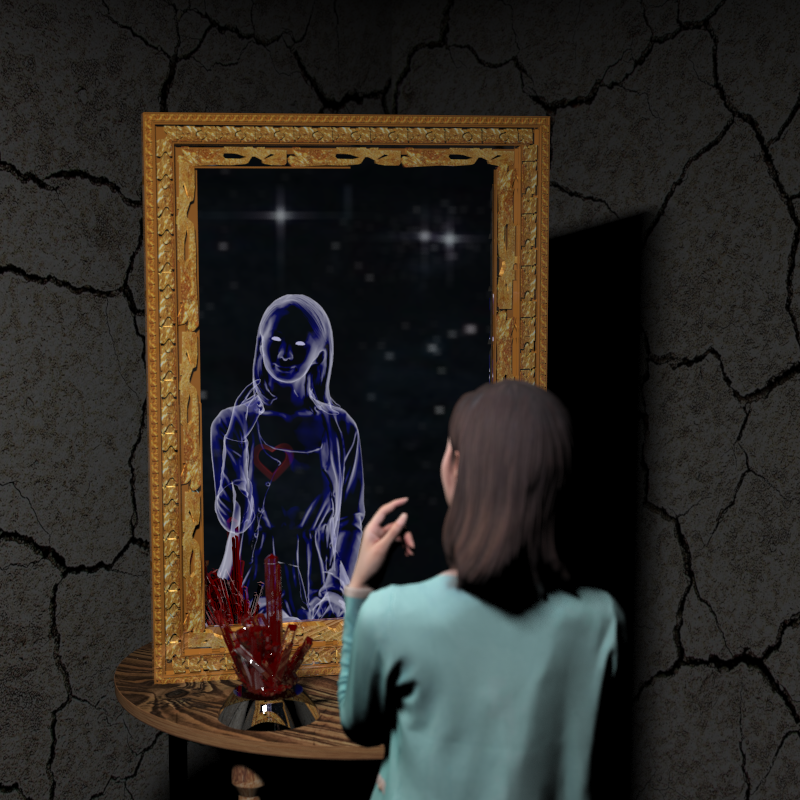
Heart Beat
A Heart has to beat!
At the beginning the mirrored Aya was only a merciless silhouette. Having seen her so heartless we've decided to give her a heart.
And as from an artistic point of view an animated heart is way more exciting than a static one, we came up with the beating heart idea.
With this target in mind we've adjusted our motion blur implementation (see below) in order to to separately save the intermediate frames, for later using them in the animation.
As an test we simply rendered 20 images (all with a different time stamp) and than converted the frames to a gif using ImageMagik. Unfortunately the filesize was quite big and the animation flickered a lot (due to randomness relating to AreaLight and DOF). To compensate this only by super sampling wouldn't have been the solution as that would have increased the rendering time a lot because we need multiple frames. So we came up with the idea to re-render the motion parts of the scene only and not all the static content. As an result most pixels in the frames are exactly the same.
The resulting gif however still had a large filesize and flickered due to compression artifacts. After some investigation we came across animated pngs. Using apngasm we were able to assemble 50 frames without any compression loss nor big filesize.

Please make sure that your browser supports APNG.
Crystal
To achieve an appealing image composition, we wanted to place something on the table. We tried multiple objects: a simple glass sphere, flowers, a sculpture: however, none of them fitted well into our scene.
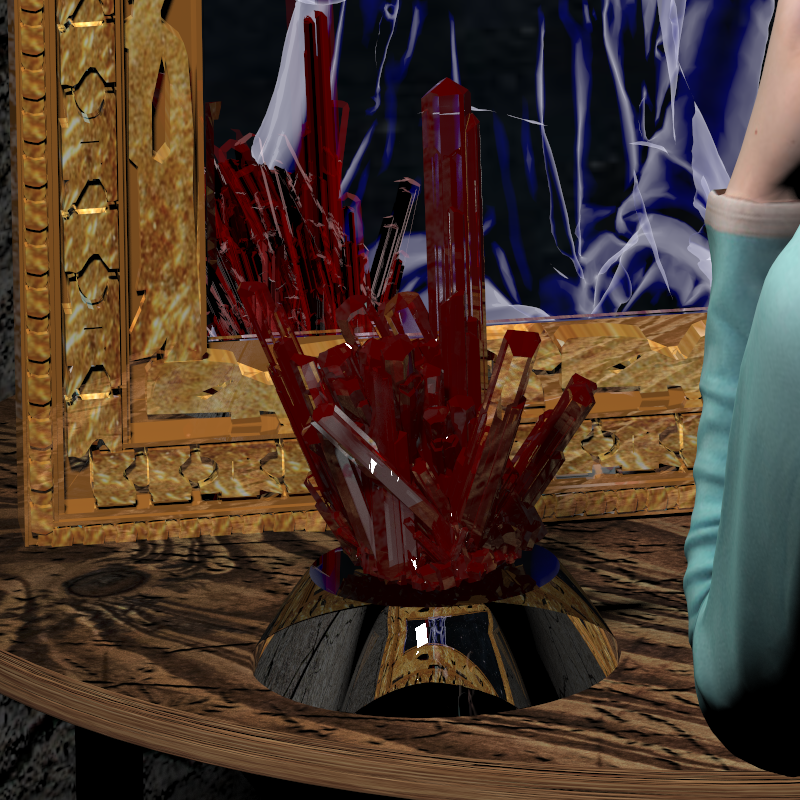
Then we had the idea to place a crystal on the table: the crystal has assigned a combined material (see below) made from glass and red lambertian material, that is also emitting a tiny bit of light itself. This mystic crystal really suited our scene and did also make it more interesting.
Quadric
As our tutor once mentioned that he has never seen a Quadric in the rendering competition so far and cannot even think of any meaningful usage of one, we took the challenge to figure out how to add one into our scene.
As a consequence the Crystal got a glass socked that is made up by a Paraboloid-Quadric within the range of a min and max point and to disks at the top and bottom.
Because we don't use a triangle mesh there, the socked is perfectly smooth and the glass refracts the light extremely realistic.
Features
Other additional features


World Mirror
As our key feature we have implemented a World Mirror Material.
Instead of sending the ray that hits the mirror back into the scene, we are actually mirroring the ray into another world.
As we could not use the getSampleReflectance method to create this effect, the World Mirror instead calls its own integrator,
and emits the light that is reflected from this second world.
This does not only allow us to change the material of the objects within the mirror, but also opens the chance to make objects visible in the mirror that are actually not there in the main world. In our scene we used this to add the glowing eyes and the environment map of the star field.
materials/worldMirror.cpp
materials/worldMirror.h
Gamma Correction
In the Color lecture we learned about Gamma Correction as a historical burden of CRT monitor times which is relevant until today because of backward compatibility.
The sRGB standardized color space (which is used in the *.png images we load and store) has a gamma of 2.2. In order to be compatible with the sRGB standard even modern digital cameras need to pay attention to gamma correction.
Having learned all that in the lecture, we were curious what effect gamma correction would have in our ray tracer. So we applied a power of 2.2 (resp. 1/2.2) in the Image::readPNG (resp. Image::writePNG) and fine-tuned lighting and ghost material.
We were quite surprised how much the result improved. Especially the lighting looks way more realistic. If we would have to choose only one additional feature to implement, we would definitively go for gamma correction.
core/image.h, core/image.cpp
core/color.h, core/color.cpp
Motion Blur
As the competitions policy only allows static images we needed a different way to feature Aya's beating heart.
We've added an optional tickTime to the Primitive class such that Primitives can alter over time. Similar to Instance we've then added Movement (for translation and rotation) and Beat (for scaling over time).
Additionally we've implemented an MotionRenderer that renders multiply frames at different points of time (by calling Primitive::tickTime), optionally stores the intermediate frames and then averages the final image.
As a nice side effect the heart in our image glows a bit more because the ghost material only shows its edges. If you look carefully you can also see that the heart gets less intense to the outside. This is due to the sine-wave-beating which you can also see in the animation above.
rt/motion_renderer.h, rt/motion_renderer.cpp
rt/primmod/beat.h, rt/primmod/beat.cpp
Depth of field
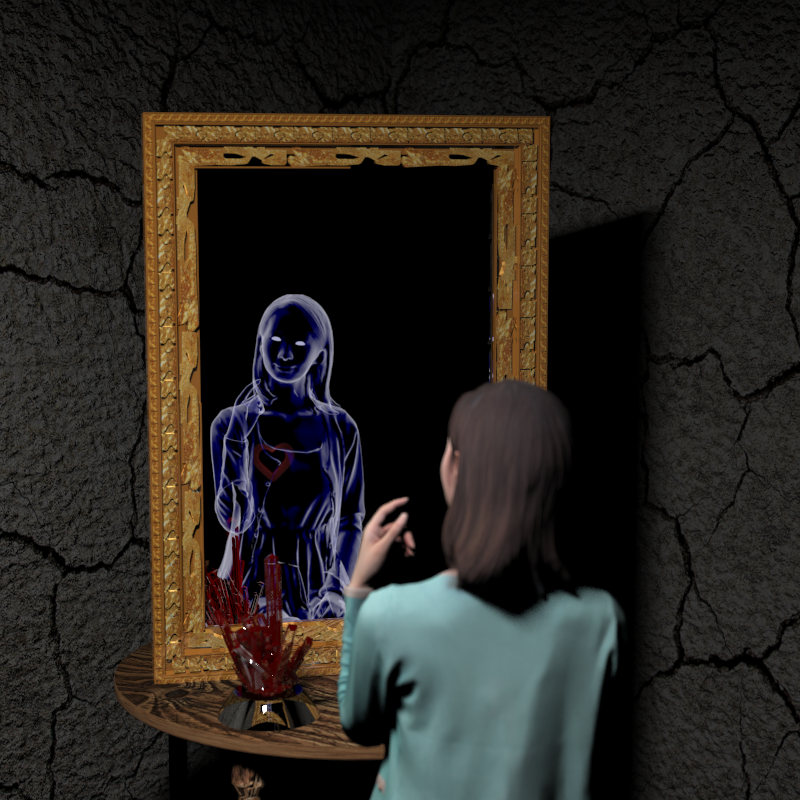
We faced the issue that the viewers focus was on the person in the foreground and not on the special feature of our scene - the objects in the mirror.
In order to get the viewers attention onto the mirror we decided to implement Depth of field and slightly blur the foreground.
Unfortunately the Crystal & Quadric got blurred too, so we had a hard time fine-tuning the focal distance and the aperture radius.
Finally we decided to set the focal distance somewhere between the mirror image and the crystal and only use a small aperture radius, so that the Depth of field effect is only visible to a careful viewer but still moves the attention to the mirror.
As a nice side effect also the stars in the mirror background got blurred. In this way the mirror got some depth and cannot be mistaken as a painting.
rt/cameras/dofperspective.h
rt/cameras/dofperspective.cpp

Smooth Triangles
If you look closely for example at Aya's right back you can see some ugly artifact because the mesh has some fairly big triangles in this place that result in sharp edges.
In order to fix that we've implemented smooth triangles which loads vertex normals from the .obj wavefront and interpolate the triangle's normal in between.
Unfortunately the aya mesh didn't have smooth normals precomputed so we've loaded the model into MeshLab and calculated smooth ones.
Lo and behold ! The tesselation artifacts are gone and Aya's clothes look way more realistic.
striangle.cpp
striangle.h
Bump Map Loading
The flat wall surface seemed a bit like a static wallpaper and in that way very unrealistic. So we decided to use a bump map there.
We have adapted the object loader (which loads the texture coordinates of all vertices), so that we can pass an additional texture that is automatically added as a bump map onto the loaded triangles.
Thereby the walls look spatial and way more like realistic stones.
We've decided to also bump map some scratches to the table. As a result the table looks kind of old and worn out which fits perfectly into our scene.
obj.cpp
obj.h
Combined Material
An realistic crystal looks similar to glass but has it's own color.
In order to accomplish that we've combined glass material with a slight red lambertian material simply by calculating the color of both materials and then taking a wighted average.
Without Combine Material the crystal would either be transparent and look like it's glass socket or not like a crystal at all.
In addition to the crystal we also used Combined Material with the mirror's frame. By adding a little of the mirror material the frame gets a slight metallic shining and looks nicely gilded.
rt/materials/combine.h
rt/materials/combine.cpp
Environment Mapping
Having only a black background in the image seemed a bit blank. So we've decided to add an environment map.
The whole (mirror) scene gets surrounded by a large sphere at infinity upon which image textures are mapped to. If there are no other objects in between all rays intersect this sphere at FLT_MAX. The actual texture coordinate is computed (only) by the ray direction.
Having that implemented we added an starry night sky into the mirror scene to create the illusion of a whole "second world" there. In combination with the DOF effect this adds depth to this second scene and makes the mirror appear more three-dimensional.
environment_map.cpp
environment_map.h
environment.cpp
environment.h
Surface Area Heuristic & Multithreading
We have implemented Surface Area Heuristic in order to speed up our BVH and make it possible to create a very detailed scene containing about 338.886 triangles.
In order to improve the rendering time further we enabled multiprocessing using OpenMP. So that we could render a 4k version of our scene with 1.000 samples within less than 50 minutes on a Ryzen 9.
sah_bvh.h, sah_bvh.cpp
renderer.cpp