A long time ago in a galaxy far, far away...
The echoes of the Galactic Civil War had finally subsided, and a new dawn emerged as Rey,
the last hope of the Jedi, stood triumphant against the malevolent Emperor Palpatine. With
the Sith defeated and the galaxy on the path to healing, Rey sought to breathe life back
into the legacy of the Jedi Order.
In her quest for knowledge and guidance, whispers of
ancient Zeffo artifacts reached Rey's ears. Legends spoke of mystical relics hidden within
the sacred halls of the Zeffo palace, artifacts that held the potential to shape the destiny
of the Jedi and the galaxy itself. With her faithful droid companion, BB-8, by her side, Rey
ventured to a distant and mysterious planet, a world shrouded in the enigma of the Force.
The planet's name, known only to a chosen few, echoed through the cosmos – Celestria.
Upon
the horizon of this alien world, the Zeffo palace loomed, a testament to a bygone era of
power and wisdom. Rey, driven by a sense of duty, embarked on a perilous journey to uncover
the secrets within its ancient walls, knowing that the fate of the Jedi Order rested on her
shoulders.
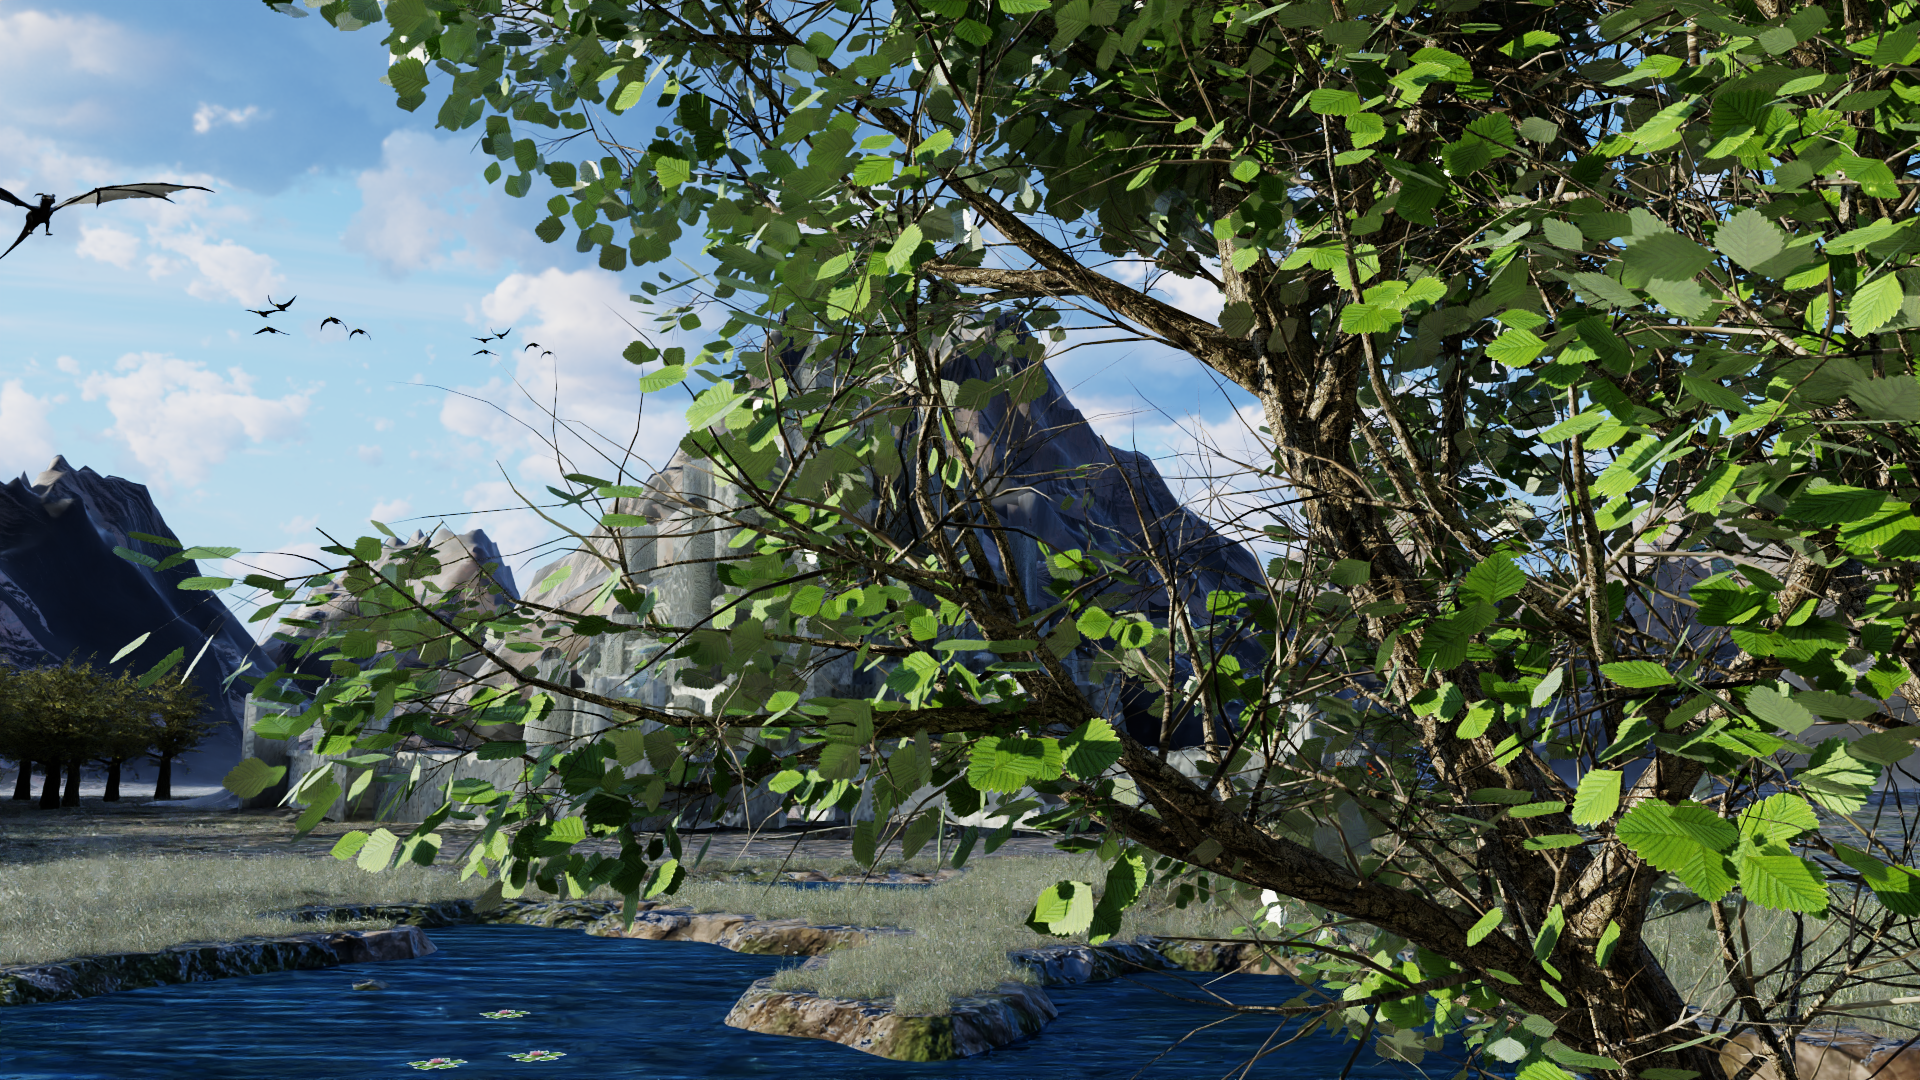
When combined with a texture, Alpha Masking enhances the representation of grass and trees,
creating a more realistic
effect. This technique selectively removes portions of meshes by ignoring interactions based on
alpha values,
particularly useful for crafting sharp and natural edges and corners for leaves. One effective
strategy for improvement
involves allowing rays to traverse based on a stochastic threshold.
For our scene, we used alpha masking for the leaves of the trees, the grass, and the
flowers.
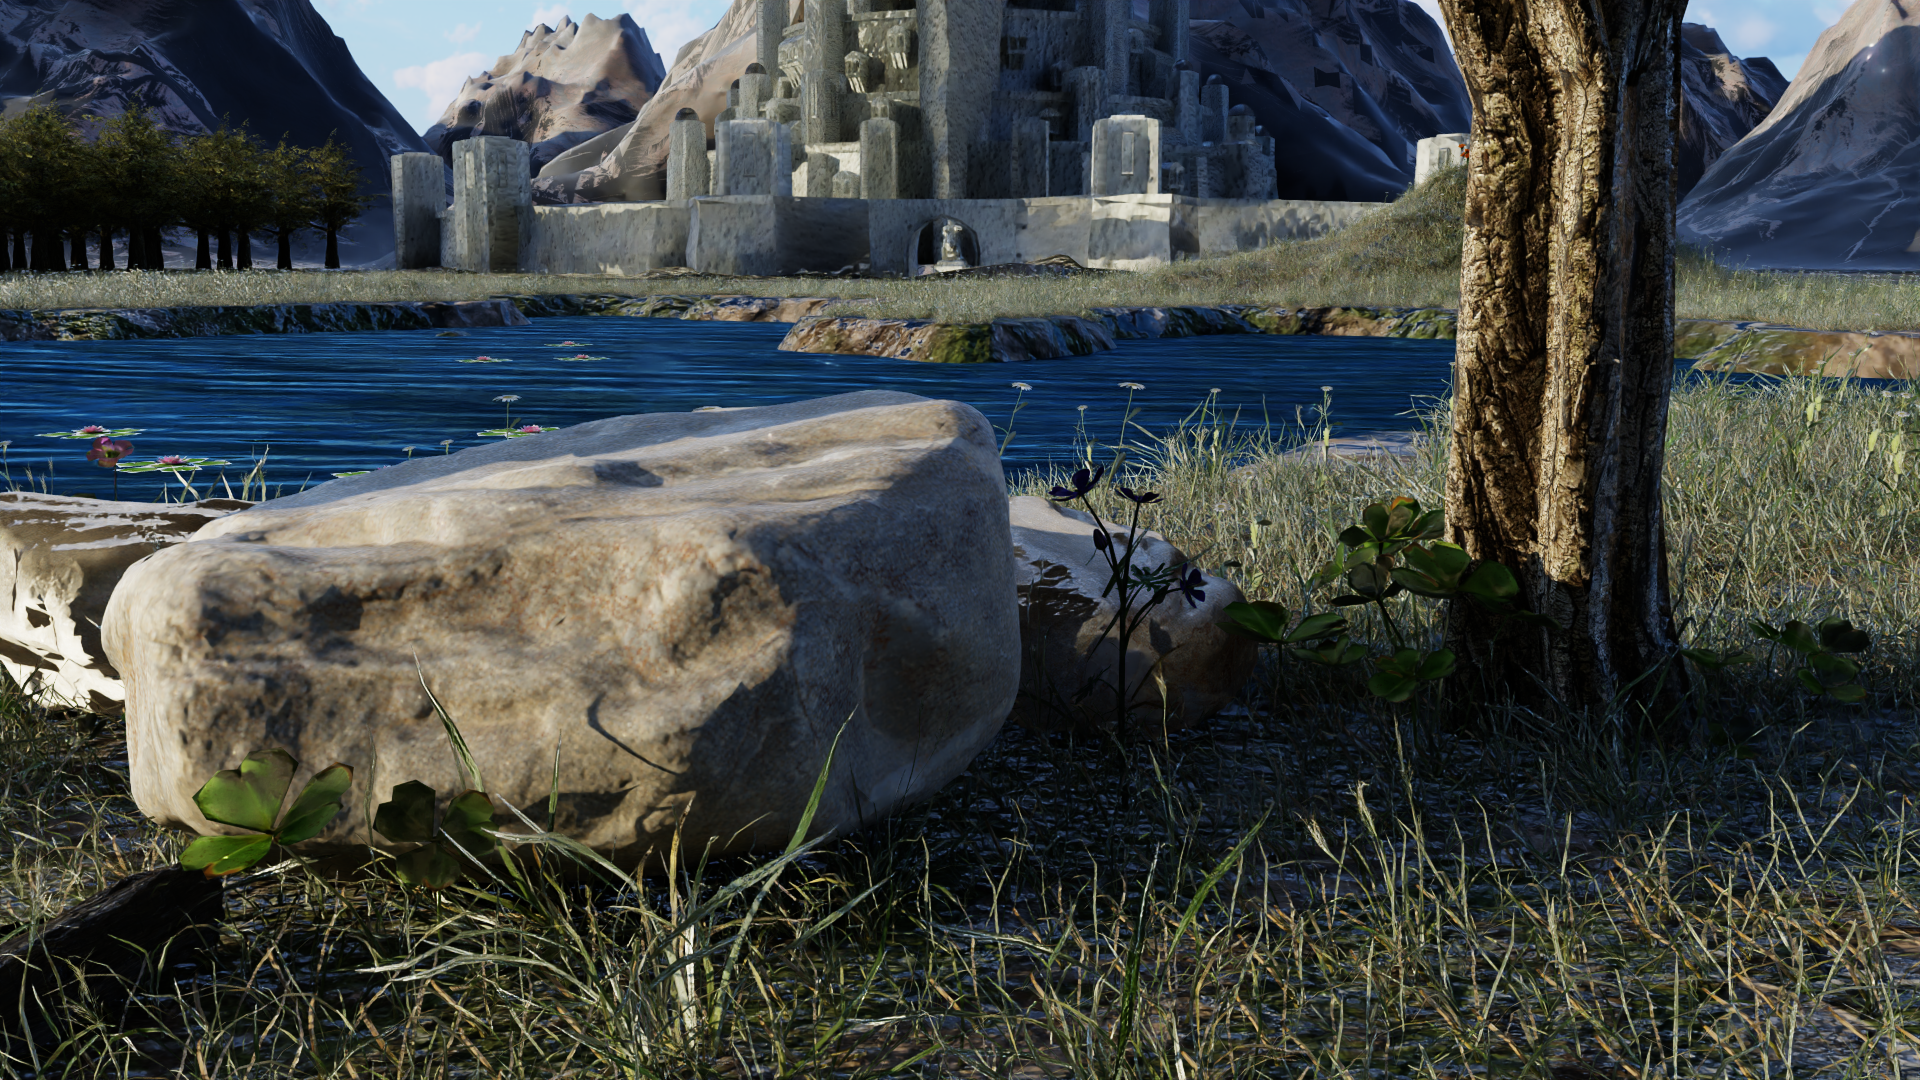
For normal mapping, we referenced this article
. A major challenge we
encountered with normal mapping was understanding the OpenGL code and what it represented in the
Lightwave framework.
Once we resolved this issue, the mapping algorithm became clear, and we achieved satisfactory
results.
For our scene, we used normal mapping for almost all of the objects.
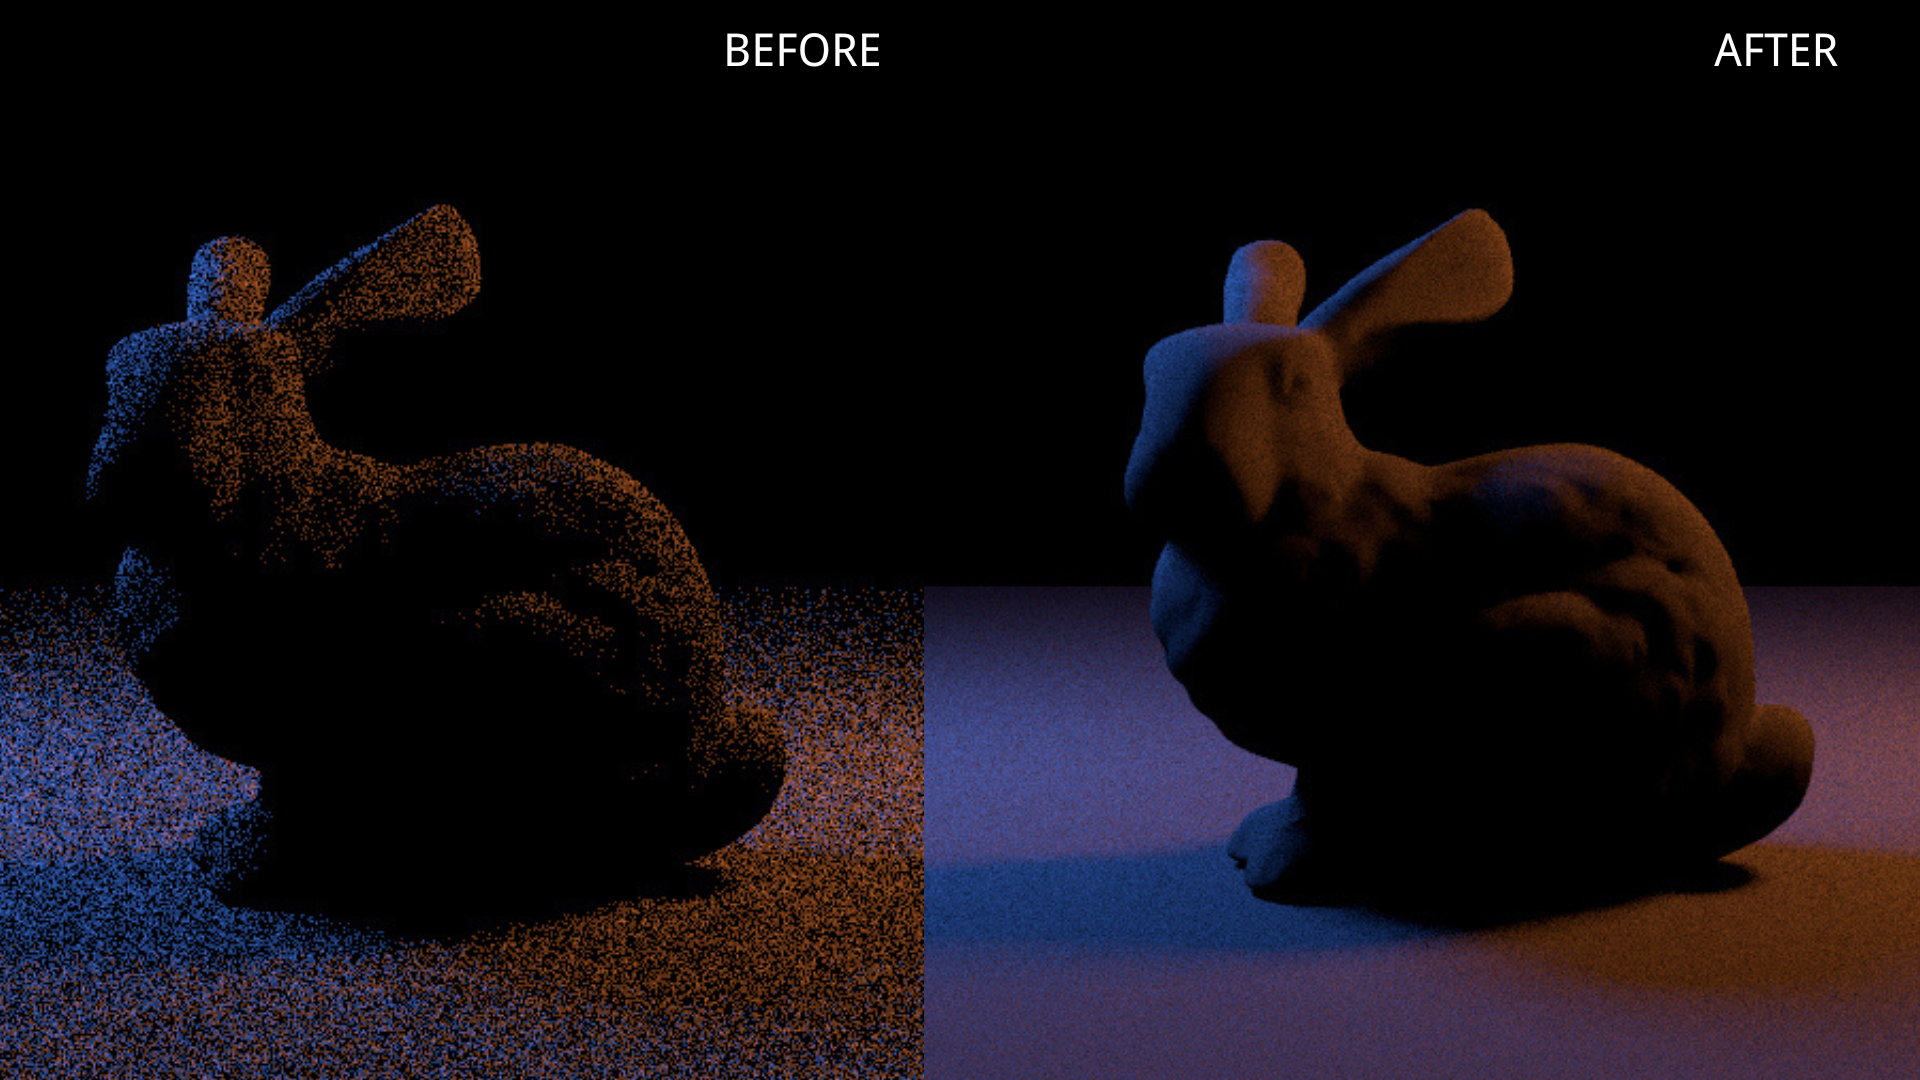
Area lighting pertains to illuminating the surfaces of objects, like spheres or rectangles, by
utilizing light sources
that emanate from these surfaces. In comparison to sampling from an emissive object, area lights
show reduced variance
due to their contribution being proportional to the surface area.
For our scene, we used a single area light on the left side of the two characters to add a
bit more lighting.
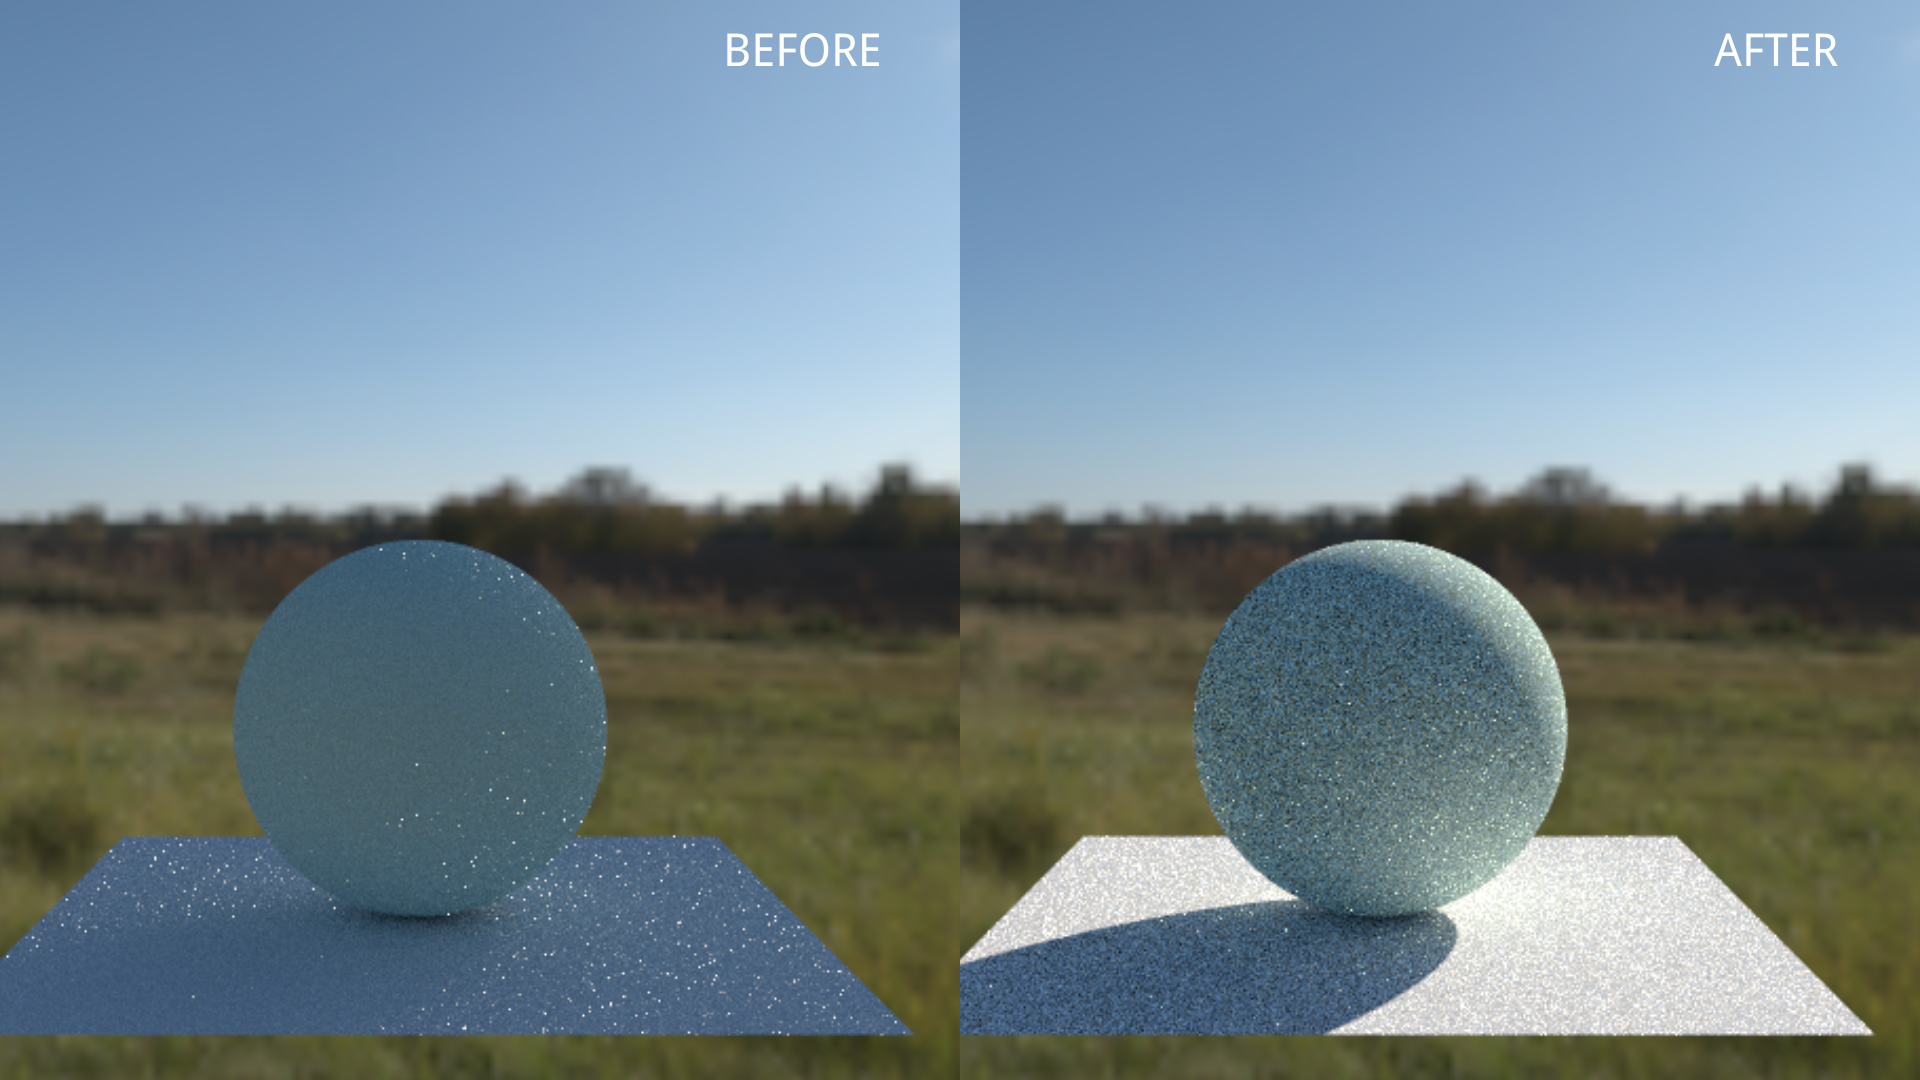
A painful implementation but it allows us to render scenes with lower-variance light sources
originating from an environment map.
The idea is to sample environmental light with higher luminance probability more often. To speed
up the
rendering process, we can precompute probability density functions (pdfs) and cumulative
distribution functions (cdfs) of luminance.
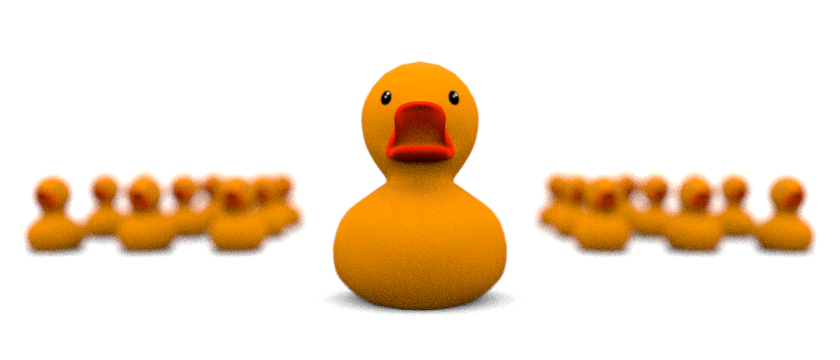
The implementation of the thin lens camera utilizes the lens radius and focal length to achieve
the depth of field
effect. The lens radius controls the amount of blur in the scene; greater radius results in more
significant blur.
For our scene, we used a lens radius of 0.005 and focal length of 0.858 to
add only a very slight blur since this camera shot didn't require high blurring for a natural
look.
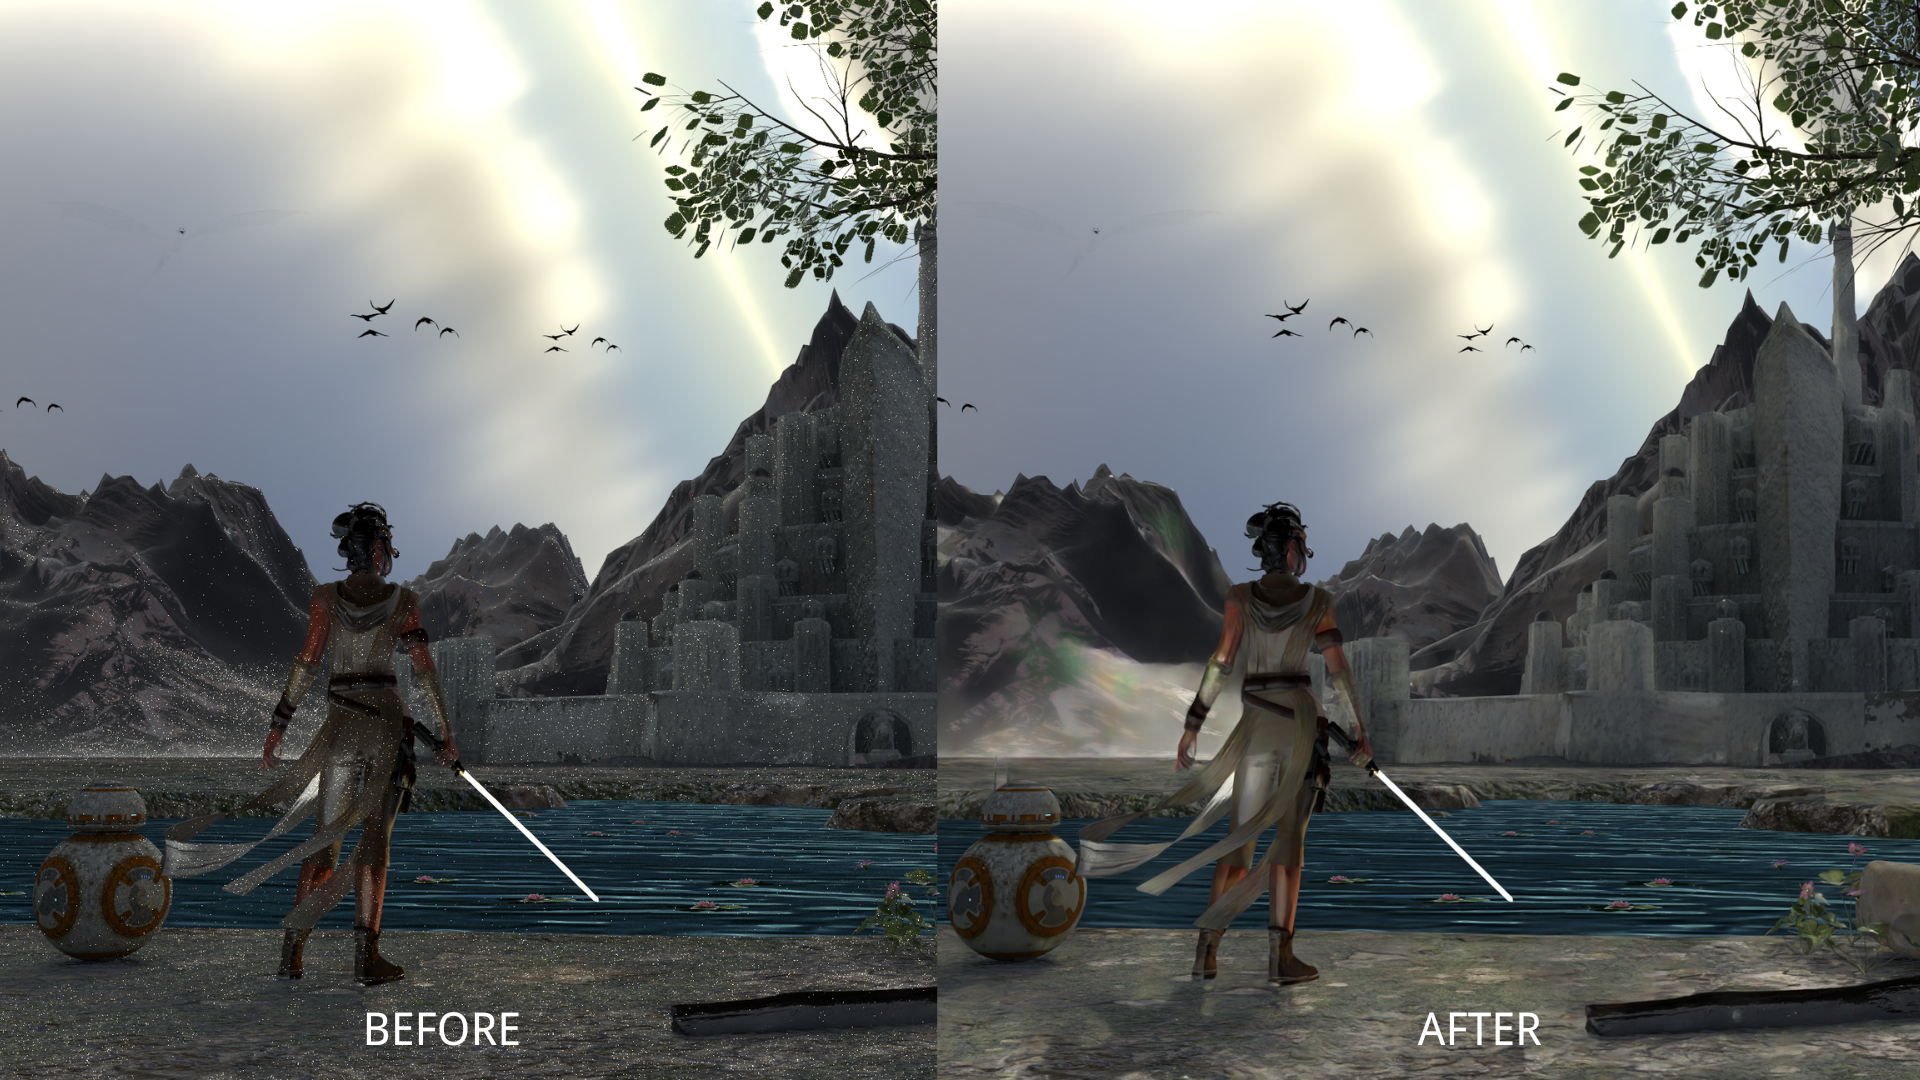
Denoising is employed to eliminate Monte Carlo noise inherent in stochastic ray tracing methods.
In our rendering
pipeline, we integrate a potent denoising
library during the
post-processing stage. This integration aims to preserve as many details as possible by
leveraging normal and albedo features.
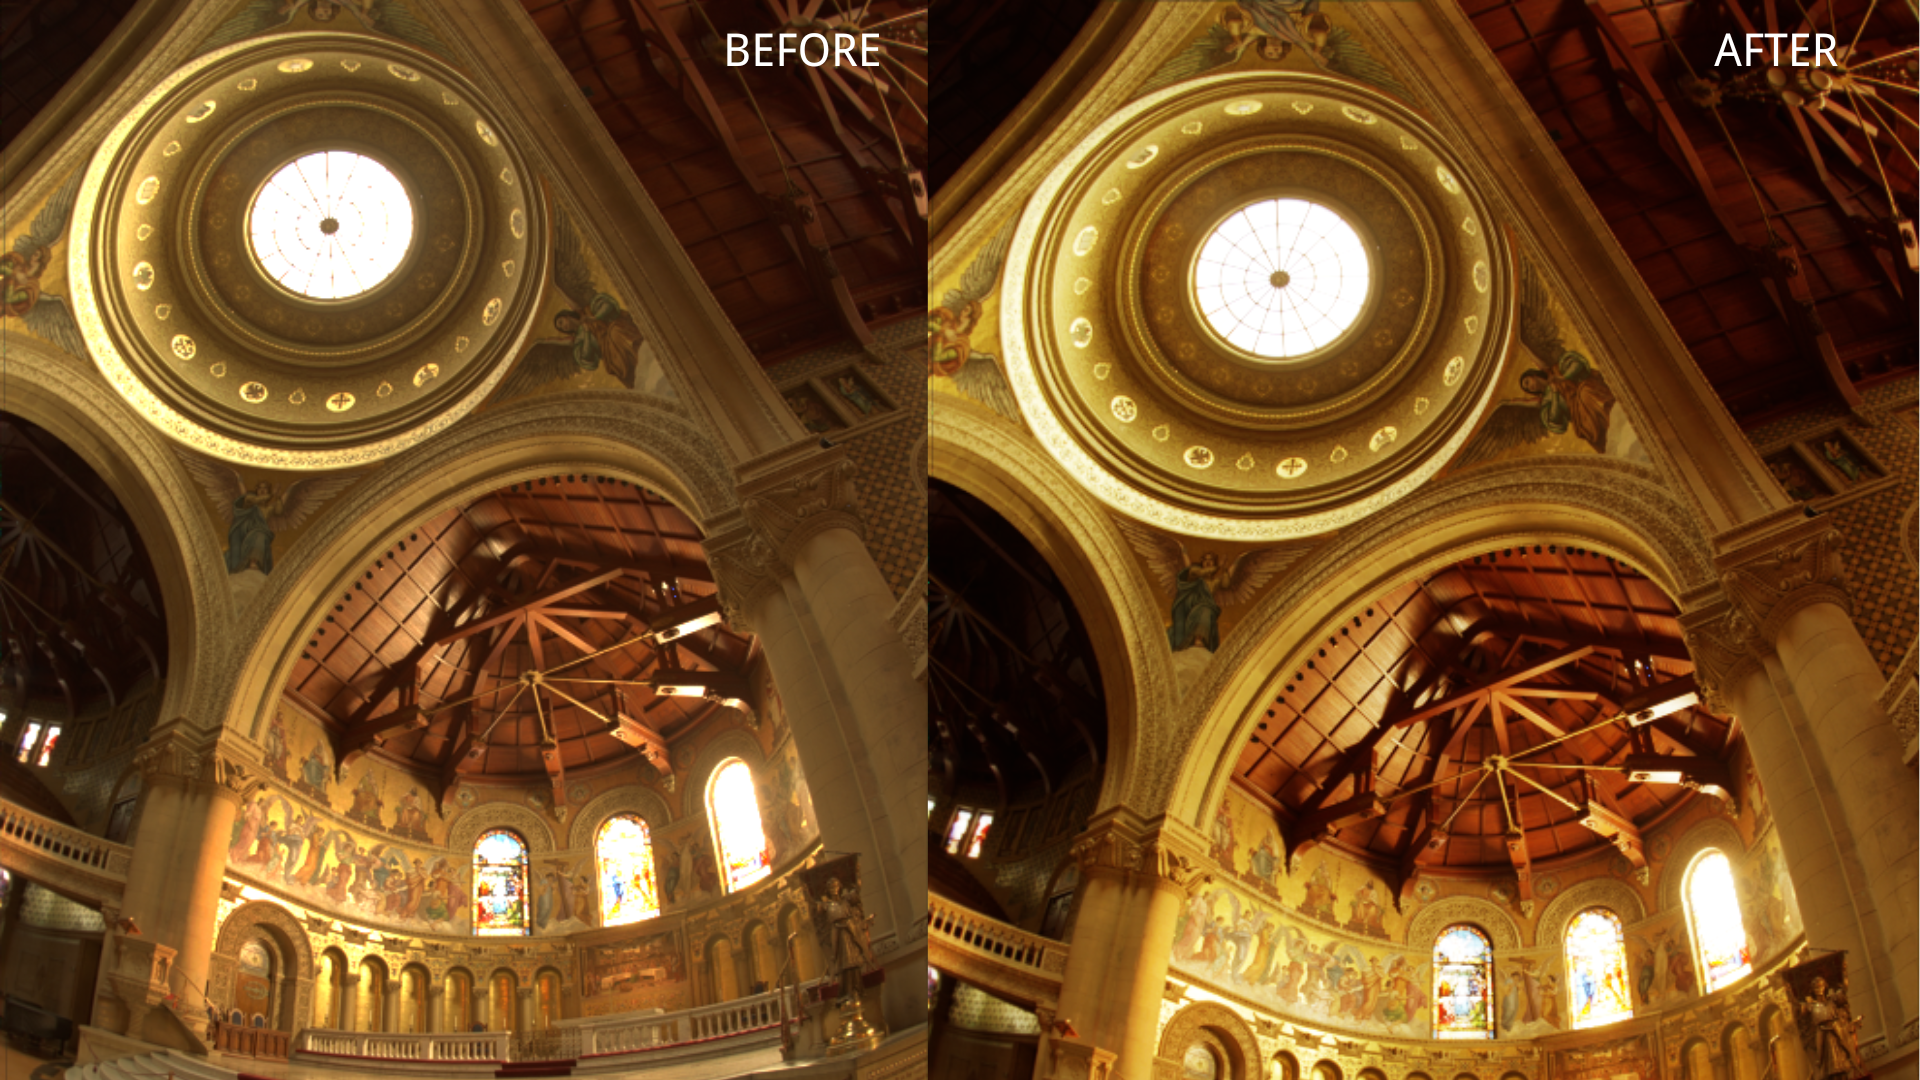
For tone mapping, we referred to the
article. We
have implemented seven methods from this article, namely Reinhard tone mapping, Reinhard-Jodie
tone mapping, Uncharted 2
tone mapping, ACES tone mapping, ACES tone mapping (worse fit), Extended Reinhard tonemapping,
and Extended Reinhard Luminance tonemapping.
For our scene, we chose ACES tone mapping (worse
fit).
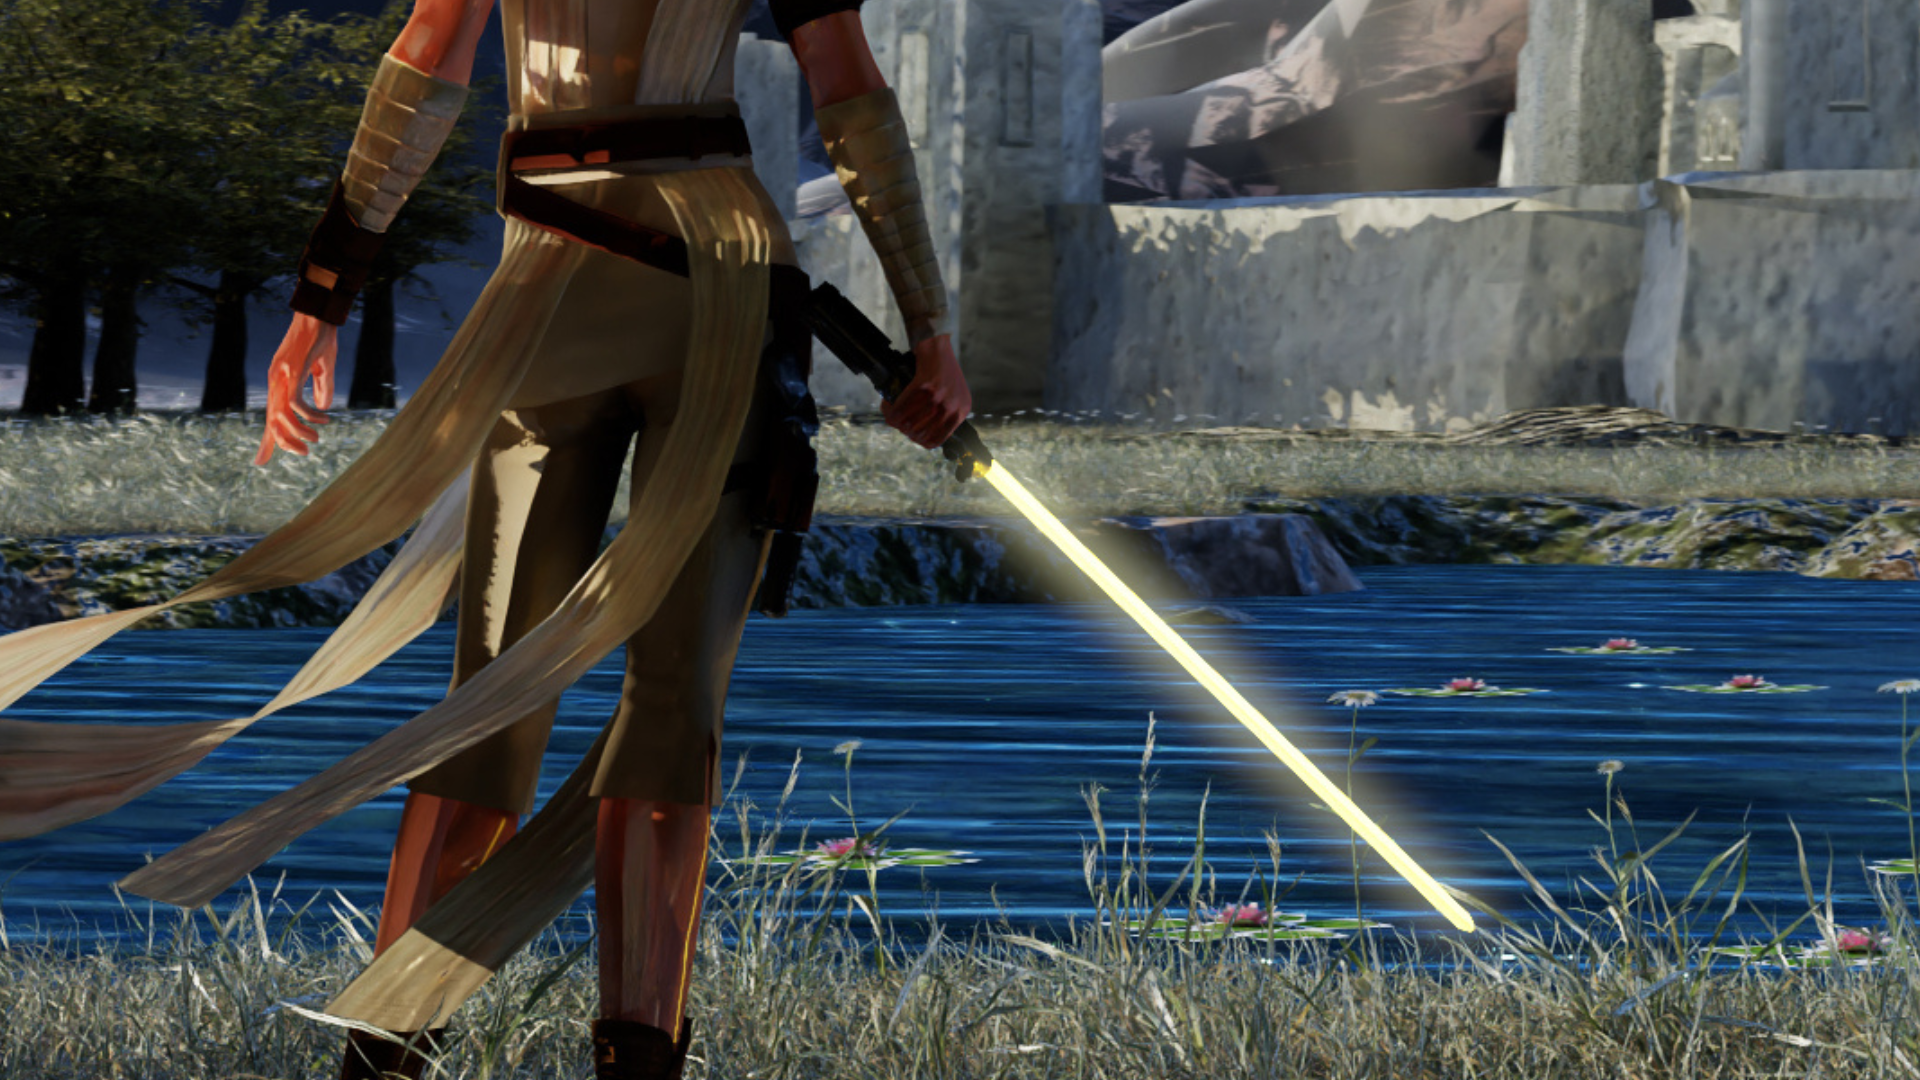
To implement bloom, we chose a 1-D Gaussian kernel. We first extracted the brightest pixels from
our image, and then applied blur, first horizontally and then vertically. Our bloom
postprocessing
also has a choice to perform this blurring for a given amount of times to get a better blur
effect.
We then add this blurred image with our original image to finally get our postprocessed
output.
For our scene, we used bloom specifically to add the natural glow around the lightsaber.