
1 Concept
"Create an original scene and use your ray tracer to create an image". This was the task given in the Rendering Competition for Computer Graphics 1. It is a very open-ended and creative task with many possibilities. Since I had not much experience with graphic design or 3D modeling, I started experimenting with Blender, looked up some models online and was thinking about various different ideas.
It was that one night, whose exact date I cannot remember, where I wasn't motivated to be productive and started up Minecraft, where the ultimate idea hit me: Creating a scene in minecraft and rendering it in my ray tracer.
2 Development
My plan was conceptually simple: find a way to parse the minecraft world files, convert the blocks and the lights into triangles and light sources and render them using my ray tracer. That way, I can just model my scene in minecraft and give it to the ray tracer.
2.1 Minecraft world and blocks
I started by implementing MCWorld,
a class that represents a minecraft world:
it consists of blocks with integer coordinates
and can be "rendered" into an rt::World
by creating lots of triangles and light sources.
I decided to create a class for every single block I potentially wanted to use in my scene. At first, this seems overly complicated, but a deeper look at the blocks in minecraft reveals that blocks can be very different: some of them are simple 1x1x1 blocks having the same texture on all sided, some have different textures on their sides and can be rotated, some are smaller than 1x1x1 or not even a block at all, etc. This ended up taking most of the development time, since I ended up implementing 543 blocks (which sounds more crazy that it actually is, since many blocks are quite similiar and can be implemented using inheritance, e.g. there are 36 stairs blocks which only differ in their texture, the model is the same).
2.2 Parsing the world
I parsed the minecraft world using the python package anvil-parser[1]. I wrote a script that creates a list of all blocks and their properties inside a given border, which is parsed inside my ray tracer. The output of the script look like this:
blocks
-608 44 -208 stone
-608 45 -208 stone
-608 46 -208 stone
-608 47 -208 stone
-608 48 -208 stone
-608 49 -208 stone
-608 50 -208 stone
-608 51 -208 andesite
-608 52 -208 andesite
-608 53 -208 andesite
-608 54 -208 stone
-608 55 -208 stone
-608 56 -208 stone
-608 57 -208 stone
-608 58 -208 stone
-608 59 -208 stone
-608 60 -208 dirt
-608 61 -208 dirt
-608 62 -208 dirt
-608 63 -208 dirt
-608 64 -208 grass_block snowy=false
...
2.3 Creating the scene
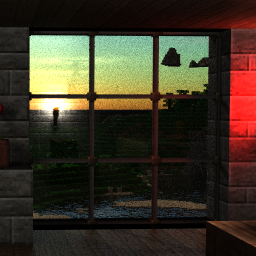
The scene was modeled in minecraft. First, I searched a minecraft world which contained: an ocean, a mountain and a place from which I can see both, where I would build the house. After a while, I found the ultimate world:
![]()
Seed: -4516399316488091734, Coordinates: -597 76 176 (Minecraft 1.16.5)
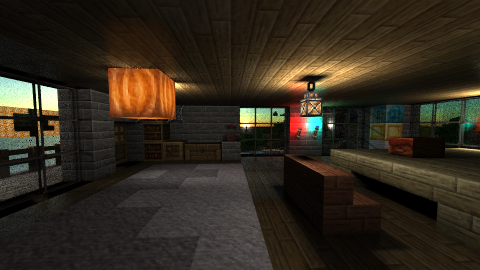
I build the house such that the ocean and the mountains are visible from inside through windows. Also, I used different materials and different light sources.
3 Highlights
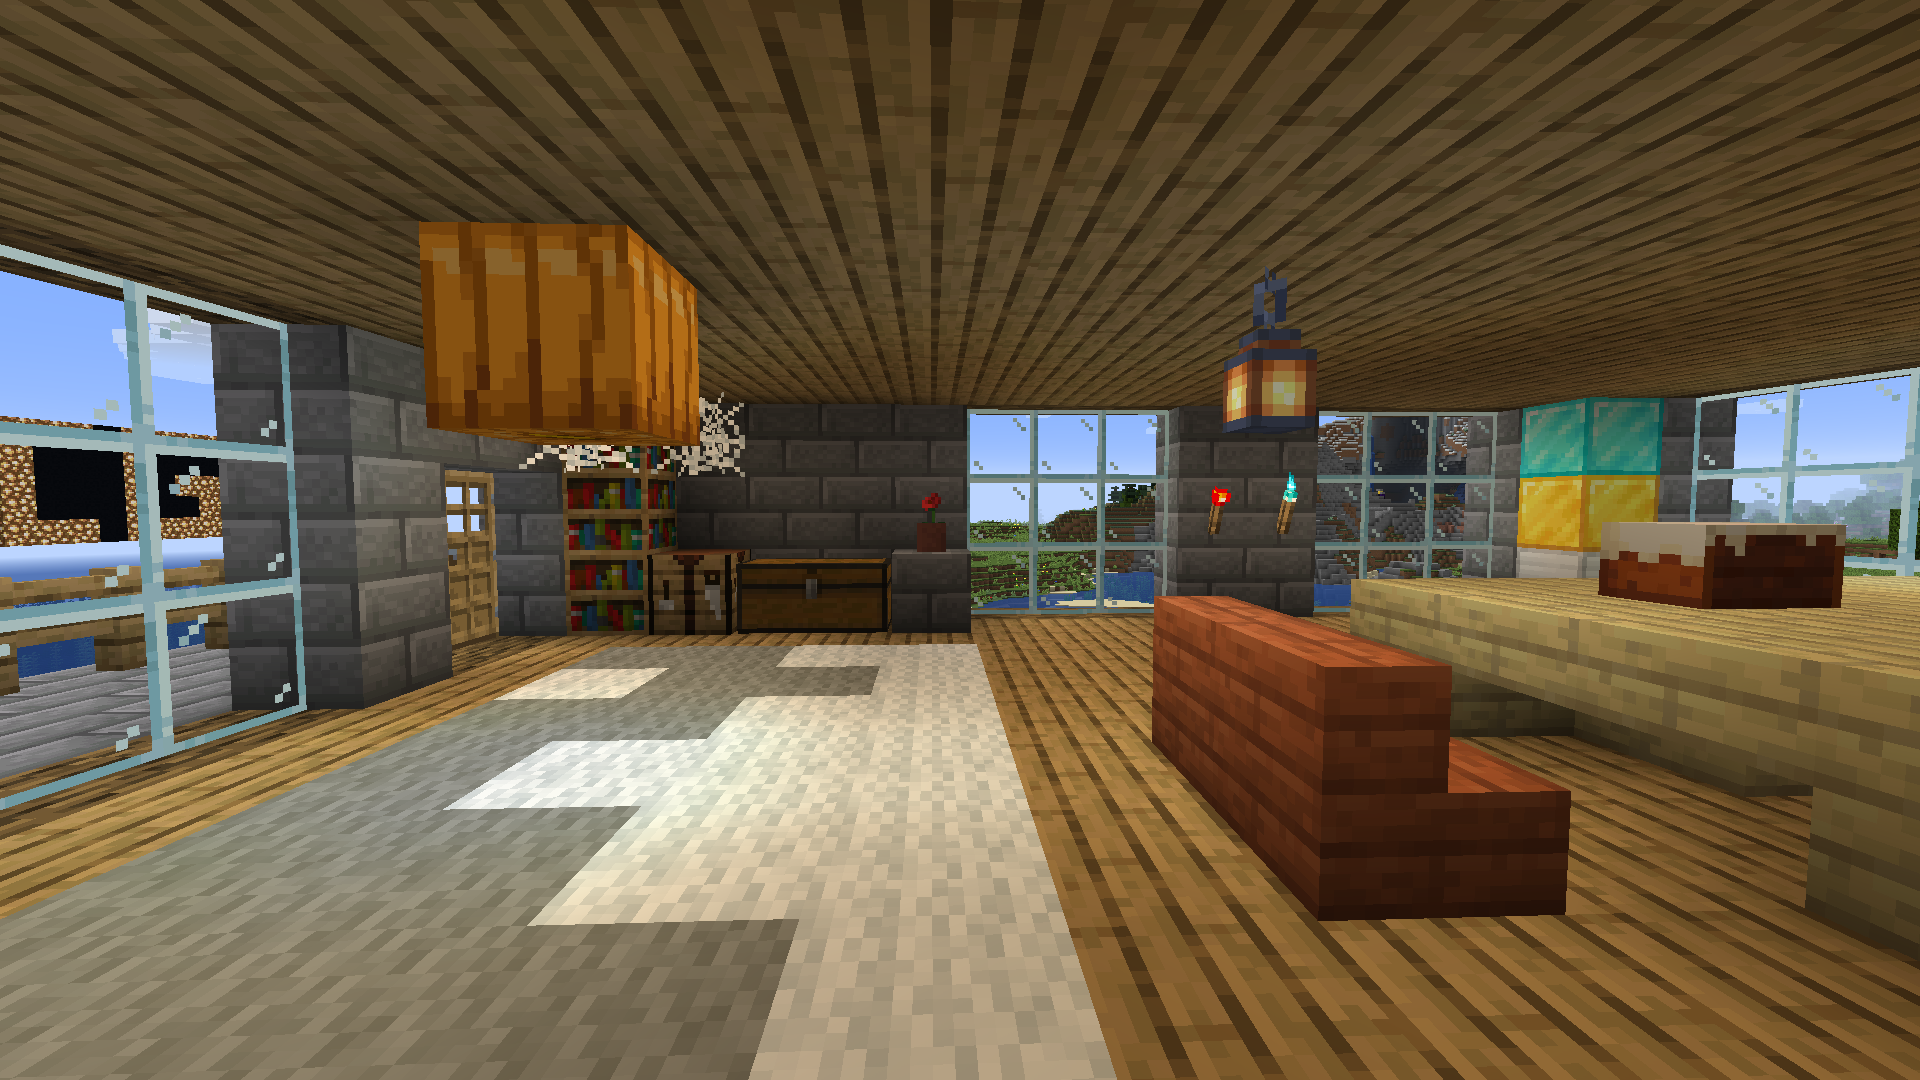
3.1 Transparent Materials
![]()
Minecraft uses a lot of transparent textures, i.e. textures, which allow you to see behind the object or, in the context of ray tracing, let light pass through them. The picture above highlights all occurences of transparent materials in the scene. One obvious transparent texture is glass, but there is also: leaves, doors, flowers etc. The screenshot below shows some blocks that use transparent textures. One way minecraft models blocks is by using two perpendicular quads with the same texture, which can also be seen in the screenshot below (the rightmost block).
![]()
This feature was implemented in several places in the ray tracer:
First, the transparency has to be read from the texture by reading the alpha channel.
This was done by modifying rt::Image::readPNG in core/image.cpp,
which now takes an extra boolean parameter alpha.
If alpha is true, the alpha channel is read as a grayscale image.
Next, I added the method getTransparency to rt::Material in rt/materials/material.h,
which returns an RGBColor.
The returned color specifies how much of the light passes through the material.
This method is needed to allow shadow rays to pass through transparent objects.
By default, the method returns RGBColor(0, 0, 0),
i.e. materials do not let light pass through them.
Next, I added the class rt::TransparentMaterial in rt/materials/transparent.cpp,
which takes a texture alpha, a material base and a material refl.
If a ray hits the material,
the texture alpha determines how much light passes through it.
The material base describes the way light passes through the object.
It can be null, in which case the light will just pass through it.
This is used for most transparent objects I implemented from minecraft.
Two notable exceptions are glass and water, which are further discussed below.
The material refl describes how light is reflected.
In most cases, this is a lambertian material.
The TransparentMaterial basically acts like a CombineMaterial
which combines base and refl,
but instead of using a constant factor for both materials,
it uses the texture alpha.
I also had to modify rt::RecursiveRayTracingIntegrator in rt/integrators/recraytrace.cpp
such that if a shadow ray hits a transparent material,
the shadow ray is extended behind the object,
just like in handling refraction.
One consequence of the modification in rt::RecursiveRayTracingIntegrator is
that more rays were casted, which increases the running time.
To compensate for this, I optimized the method
rt::Triangle::intersect in rt/solids/triangle.cpp
such that if the material at the hit point is fully transparent,
i.e. RGBColor(1, 1, 1),
the method returns Intersection::failure.
3.2 Thin Glass
If light hits glass, light does not just pass throught it,
but it gets refracted and reflected.
Therefore, I first wanted to use TransparentMaterial combined with GlassMaterial,
which was not possible,
since shadow rays cannot pass through objects if the light refracts.
Therefore, I implemented rt::ThinGlass in rt/materials/thinglass.cpp,
which acts like an infinite thin plane of glass:
it reflects part of the incoming light, but does not refract it.
3.3 Water
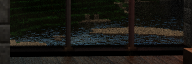
Water is rendered by tessalating the surface into triangles with a ThinGlassMaterial,
whose height is modified using perlin noise[2].
3.4 Realistic Sky

After some digging around (no pun intended),
I found the article "Simulating the Colors of the Sky"[3],
which describes how to render the sky
using volume rendering techniques and
computing Rayleigh scattering and Mie scattering.
I implemented this in rt::SkyTexture in rt/sky.cpp,
which is used in combination with the already implemented
solid rt::Environment and coordinate mapper rt::EnvMapper.
3.5 Combined Materials and Fuzzy Mirrors

Combined Materials and Fuzzy Mirrors were already implemented in the ray tracer.
3.5 Fuzzy Directional Light
Directional Lights are meant to simulate sun light, but result in hard shadows.
Even though the sun is very far away,
the shadows are quite hard, but not 100% hard.
To get smoother shadows from sunlight,
I implemented rt::FuzzyDirectionalLight in rt/lights/fuzzydir.cpp.
It behaves similar to rt::DirectionalLight,
but the light direction is randomly perturbed.
The maximum angle between the perturbed vector and the light direction
is specified by the parameter fuzzyangle.
I also used this to simulate sky light,
which is a rt::FuzzyDirectionalLight
with the direction Vector(0, -1, 0)
and a fuzzyangle of 90°.
3.6 Optimizations
These are not directly visible in the image, but improved the quality of the image.
-
The main optimization was using a bounding volume hierarchy (BVH)
based on a surface area heuristic.
This was already implemented for the assignment sheets and can be found in
rt/groups/bvh.cpp. This improves the rendering time by a lot, since it reduces theO(n)running time for the ray-scene intersection to anO(log(n))running time. -
I implemented multi-threading in
rt::Rendererinrt/renderer.cpp. Every thread renders a different pixel. For me, this sped up the rendering by a factor of ~4. -
One further optimization was in
rt::RecursiveRayTracingIntegratorinrt/integrators/recraytrace.cpp: Before the optimization, it computed the shadow ray for each light source and if there is no intersection, it computed the reflected light. I optimized it by first computing the reflected light and only computing the shadow ray if the reflected light is above some threshold. This allows omitting the shadow ray computation for very weak light sources, which sped up the rendering by a factor of ~20. This comes from the fact that the scenes generated from minecraft worlds contain a lot of small, weaker light sources. -
When inspecting the rendered images, I noticed that some regions of the image were quite clean whilst others contained a lot of noise, especially regions containing materials such as glass or sand. This lead me to an optimization I called "adaptive sampling", which can be found in
rt::Renderer::render()inrt/renderer.cpp. The idea is to use more samples for pixels which contain more noise.The renderer divides the given number of samples into "rounds" of 16 samples, in which each pixel gets 16 samples on average. This means each round has a total number of
16 * (number of pixels)samples, which are distributed as follows:- In the very first round, all samples are distributed uniformly over all pixels, i.e. each pixel has 16 samples.
- After the first round, each pixel gets 8 samples, i.e. half of the samples are distributed uniformly over all pixels.
- The remaining samples are distributed as follows: The amound of samples for each pixel is proportional to the mean squared error of the samples from the last round of that pixel, divided by the sum of mean squared errors of all pixels.
This distribution guarantees that when using
nsamples, the image is at least as good as an image rendered withn/2samples. The screenshot below shows the effect of the optimization on a test scene containing glass and water. Although using only 64 instead of 256 samples, the noise inside the glass and water regions is significantly less when using adaptive sampling.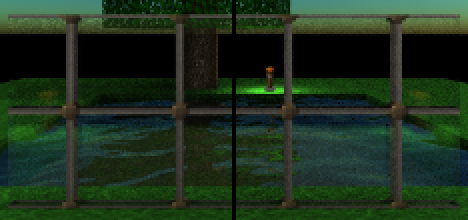
Left half: 256 samples; Right half: 64 samples with adaptive sampling
4. Textures
The rendering competition requires all third-party assets, which includes the textures of minecraft, to be publicly available for free. Since the default minecraft textures are ony available by buying minecraft and extracting them from the jar-file, I decided using the texture pack Clarity[4]. Since this is a 32x32 texture pack, i.e. each texture has a size of 32x32, I decided to use nearest neighbour texture mapping.