My first ideas for an image consisted of some low-poly to high-poly scene transitions or pixel art designs. However, I wanted to challenge myself to generate a more realistic-looking image of an everyday scenery. That is why I decided to model a street alley.
At first, I was undecided, whether the scene should be rather inviting and cozy-looking with a little cafe in the sunshine or rather dark and uncomfortable.
When building up the initial elements of the scene, namely the car, dumpster and anterior street lamp, I just added very few light sources, such that my models were visible. I liked the dark aesthetic of the first images, so I kept this theme.
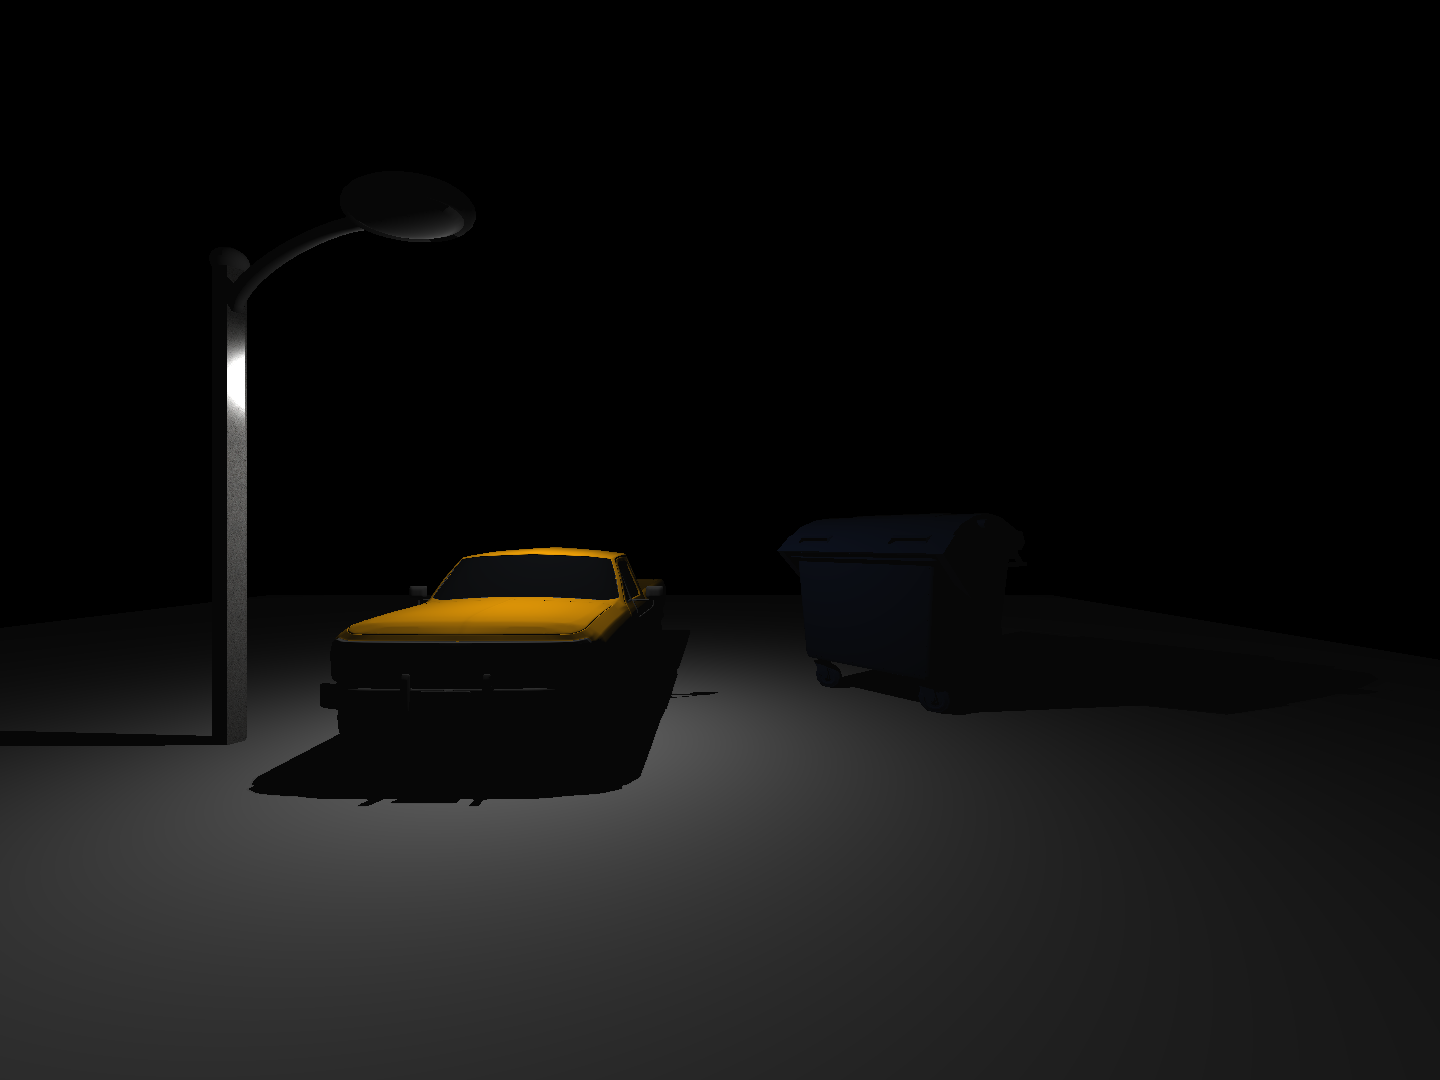
Initial setup of the scene
Next, the two houses in the front were added. I used the same model for both houses to bring out the monotony of a suburban area with systematically build residential districts.
As the buildings do not look too modern, I decided not to use a tarred street, but went with cobblestone instead. The cobblestone also conveys the feeling of a small alley better.
Initially, I planned to build a dead street end. However, it felt like three connected house walls would have made the scene too restricted and I would not have been able to show any more of the environment - such as the sky - to put the scene into context.
Hence, I added a larger street from which the alley is forking off. I made the main road look wider, changed the street material and later on decided to add a bus station, as well as the stop sign.
At first, my idea was to use a dark night sky for the scene. However, I quickly decided that a black sky was too boring. When I experimented with different constant sky colors, the concept of a dusty sky with orange glow appealed to me.
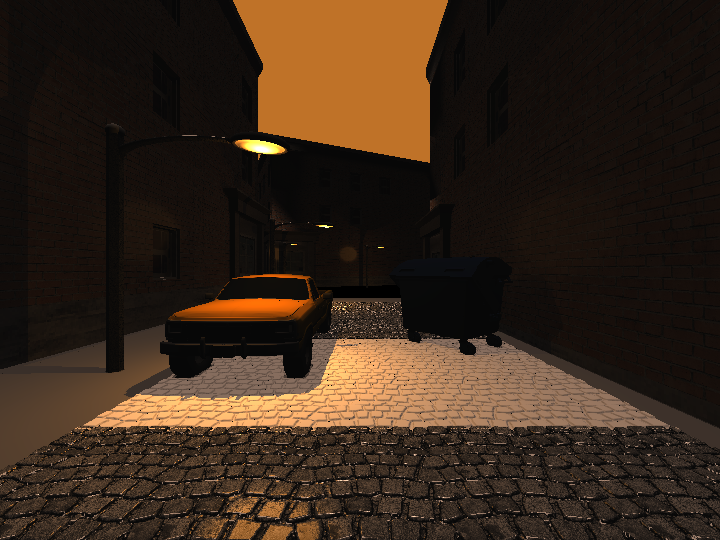
Scene with constant orange sky
However, constant colors did neither look realistic, nor pleasing. That is why I decided to use an image texture. The texture was mapped onto two large triangles such that it could fill the whole sky, without any need for repeating the texture, which otherwise lead to undesired edges.
The image texture also introduced an additional lightsource, visible in the lower left corner of the sky. Its position was considered in the placement of lights in my ray-tracer as described below.
It was quite a challenge to set the lighting of the scene to fit a dark alley, but to also have enough details visible. I wanted the image to convey the feeling of a dull suburban area under a sky filled with smog from the nearby city and factories. Additionally, the color of the sky had to match the tones of the overall lighting to make the scene appear realistic.
I started working on the light emitted from the four streetlamps, where a combination of a spot- and point light was used. Initially, all lamps emitted pure white light. However, this gave the image an artificial looking appearance, as the color was too cold and did not fit the smoggy sky aesthetic.
Hence, looked up some common RGB emission values for street lamps and settled with a warmer, yellow tone.
At first, I also added some directional lights in a yellow-rosy color to light the objects up a bit more. However, these lights caused additional shadows that I considered too harsh.
Scene with added directional lights casting multiple shadows
When adapting the directional light to not cast any shadows, the brightness level seemed too artificial and shadows were barely visible anymore. Hence, I decided to only use the streetlamps as light source, increased their radius, as well as intensity.
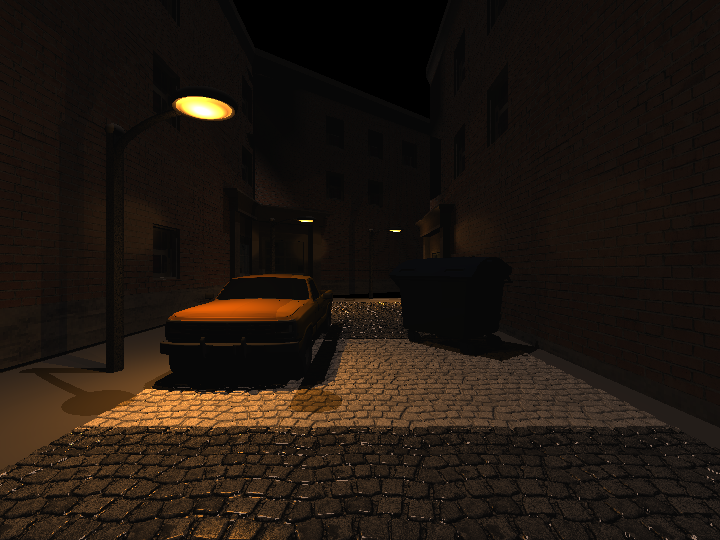
By removing the directional lights, the upper half of each house was very dark, which was not realistic considering the sky lighting and the real-world global illumination.

Upper halves of the houses are not illuminated anymore
That is why a point light in an orange-pinkish color was added. This light is supposed to mimic the illumination coming from the sky’s light source, which is just slightly visible on the lower left part of the sky: the right house is partly illuminated by it, whereas the rear building – back-facing this light – is not lit additionally.
To further counteract the darkness, and to imitate global illumination, each object was additionally assigned a small level of self emission.
I wanted to combine the idea of a foggy city area with the aesthetic after it had rained a while ago. To convey this “after rain wetness”, I adapted the specular components of the floor and also the hydrant on the left to be more reflective and shiny. The influence of this modification can be seen in the two images of the lighting section.
It was interesting to see, how adapting the material-parameters can not only be used to decide what type of material is depicted - for example metal, concrete or wood - but that it can also give the material specific properties, such as wetness in this case.
When I was overall happy with the scene, I added some details to make it look more realistic and visually appealing. For example, concrete textures were used to make the previously constant-colored sidewalk look more natural. Also, I added the hydrant, electronic box with cables on the right wall, the stop sign, as well as a bus stop in the back.
As final object, the large electric pole in the background of the scene was added, which fit my overall “industrial theme” and also gave some environmental context to the alley.
Lastly, I did not like the fact that the car front was completely dark. To bring out the car lights, I assigned them a small level self emission in the color of the headlights and turn-indicators, respectively.
I also thought about adapting the color of the car, as it poses quite a contrast to the darker, toned down colors of the scene. However, I felt like the colorful lit-up car works as a good initial focus point for the viewer’s attention. When looking at the image for a longer time, all the remaining details can be discovered hiding in the shadows…
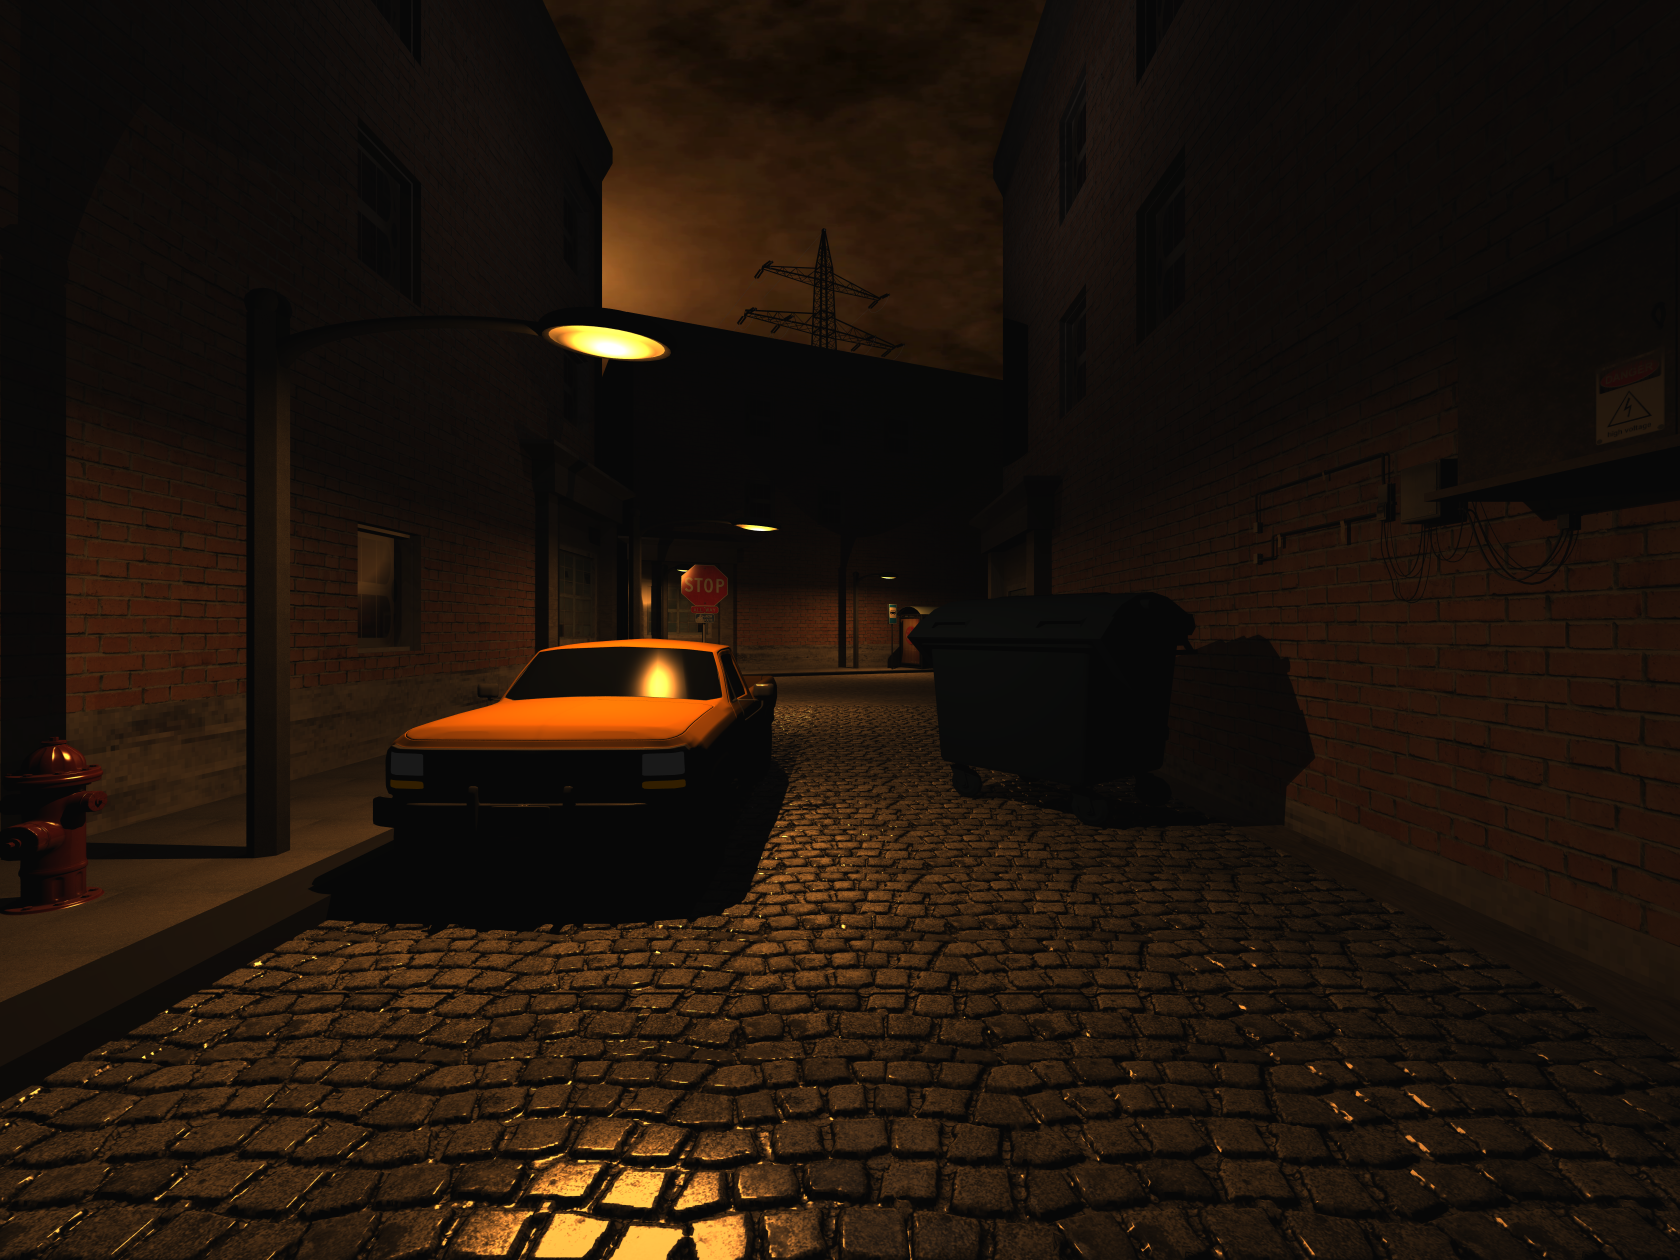
The final image
| 1.3M | Triangles |
| 43 | Materials |
| 25 | Textures |
| 400 | Samples |
... rendered in < 8 hours
Application and extension of the features presented in the CG lecture.
Parallelization and an SAH-based acceleration structure allowed a fast rendering process.
Combination of differently colored light sources, targeted self-emission and image textures to convey a realistic appearance.
Adaptation of different materials to the environmental conditions.
A whole lot of (actually non-available) time went into the familiarization with Blender and the adaptation of each model to fit my scene perfectly.