Computer Graphics 25/26
Tunnel Wenny Pise
Abstract/Idea
Motivation
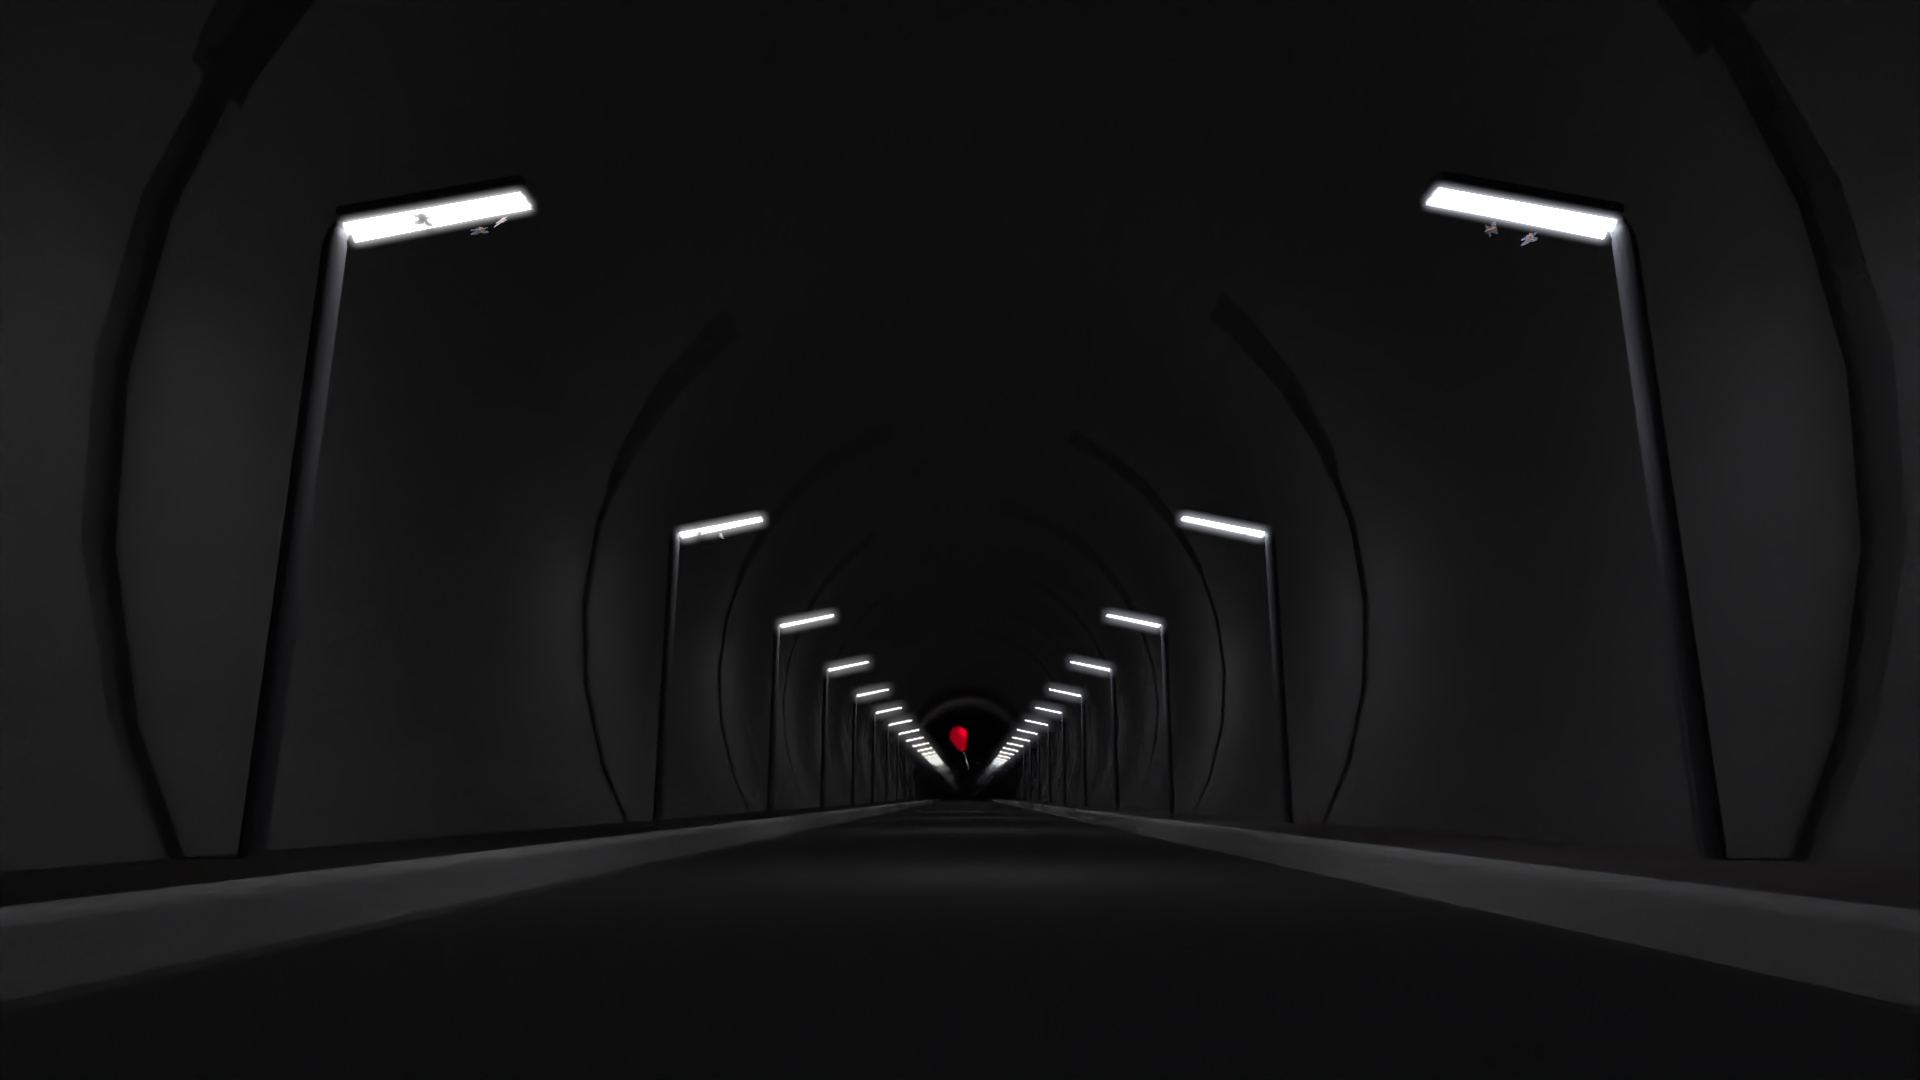
I recently watched the show "It: Welcome to Derry" and felt inspired to create a spooky scene.
Noticing that the scariest parts of the show were created by a specific set of conditions, I tried to
incorporate them into my scene:
"It" being not visible on screen, but its presence undeniable due to hints like the typical red carnival
balloon,
empty foggy streets, or locations that feel just slightly off.
Besides that, I like the idea of liminal spaces:
Transitional areas that create an eerie feeling by disregarding expectations we have of the place.
Like a shopping mall
completely void of life with all lights and shops opened feels very wrong as we would expect many people
roaming about.
The tunnel I have chosen also represents such a transitional space, connecting entrance and exit,
but its seemingly infinite length, the absence of any cars or human presence (not even trash)
and the presence of a single red ballon floating in the middle of the road makes the viewer feel very
uneasy. The balloon is totally out of place and does not belong there by any means, and even the
question
of where it came from is hard to answer.
People that know the character "It" will probably understand the scene rather quickly, amplifying their
discomfort.
Artistic Intention
I tried to find out how scary I can make a simple static rendered image.
Besides the setting, there are a few implicit details that make the scene more spooky.
It is rather obvious from the characteristic balloon that one is not alone in this tunnel.
The options to escape this situation are very limited, as the tunnel provides no hiding spaces.
There are only two theoretical directions to flee in, and running towards the balloon seems foolish.
The impossible length of the tunnel does not increase comfort either.
It should evoke unease, fear, claustrophobia, crushing pressure, despair, and a helpless, panicked urge
to escape
this place.
The camera is also very low on the concrete street, such that the tunnel feels even larger.
The denoising effect creates many artifacts that actually help building the dreamy, washed-out look
making us feel even more uneasy.
The balloon pops out because it is lit from behind (rimlight) and from the top right, creating a
the vibrant highlight and focal point of the scene. The shape of the tunnel and the rows of street-lights
guide the viewers eye towards the balloon.
Interesting Details
There are moths at a few of the lamps (their wings use alpha masking), and the long shadows of the street lamps do not really make physical sense here (many invisible point lights). This is intentional as powerful beings seem to affect lights in a weird way (at least this is what watching spooky media taught me).
Render Time
Hardware
Intel(R) Core(TM) i7-10700K CPU @3.80GHz
16GB RAM
NVIDIA GeForce RTX 3060
The Process
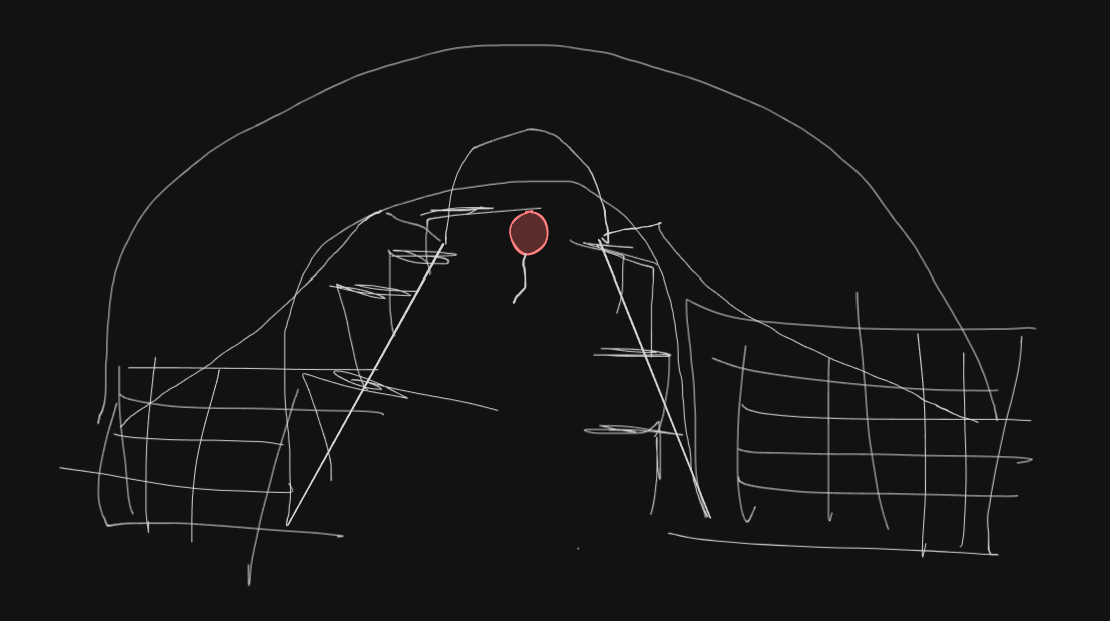
I started by just playing around with shapes in blender. I modeled a street, noticed I need some sort of background, and decided to make a tunnel to avoid having to create a landscape and skybox. I modeled the street lamps almost two years ago, so I could already use them to illuminate the tunnel. Then I played around with volumetrics, and created fog at the end of the tunnel. As the scene was already looking a bit spooky, I modeled a balloon inspired by the show I recently watched. I also created a very rough sketch of what I had in mind using Excalidraw:
My workflow was very tedious and iteration speed was slow. I edited the exported xml file manually to add post processing effects, volumetrics shapes and alpha masking every time I modified and re-exported the blender scene. There has to be a better way, but I could not figure out how to make this process more efficient (within time constraints). Sadly this negatively impacted my ability to try out new lighting setups. But as the scene is meant to feel a bit empty and light should not be colored and distract from the saturated red of the balloon, this did not affect my scene as much as it would have a more vibrant one.
Intermediate Steps
I tried to add a light shaft that hits the balloon, but failed to make it look acceptable. In hindsight my scene is probably better without it, as it would take away attention from the balloon and make it less readable. Below are some of the renderings I created to test out scenes:

Third-party assets (final render)
I did not use any third-party assets, all geometry has been modeled by me in blender. I also made the texture for the moths using Aseprite. The scene does not use any other textures or normal maps.
Third-party assets (feature showcase)
I created the green leaf texture myself using Aseprite. Normal map and brick-pavement texture are from https://polyhaven.com/a/brick_pavement_02, I also used this (https://polyhaven.com/a/brick_pavement_02) asphalt texture for testing.
Features
Alpha Masking
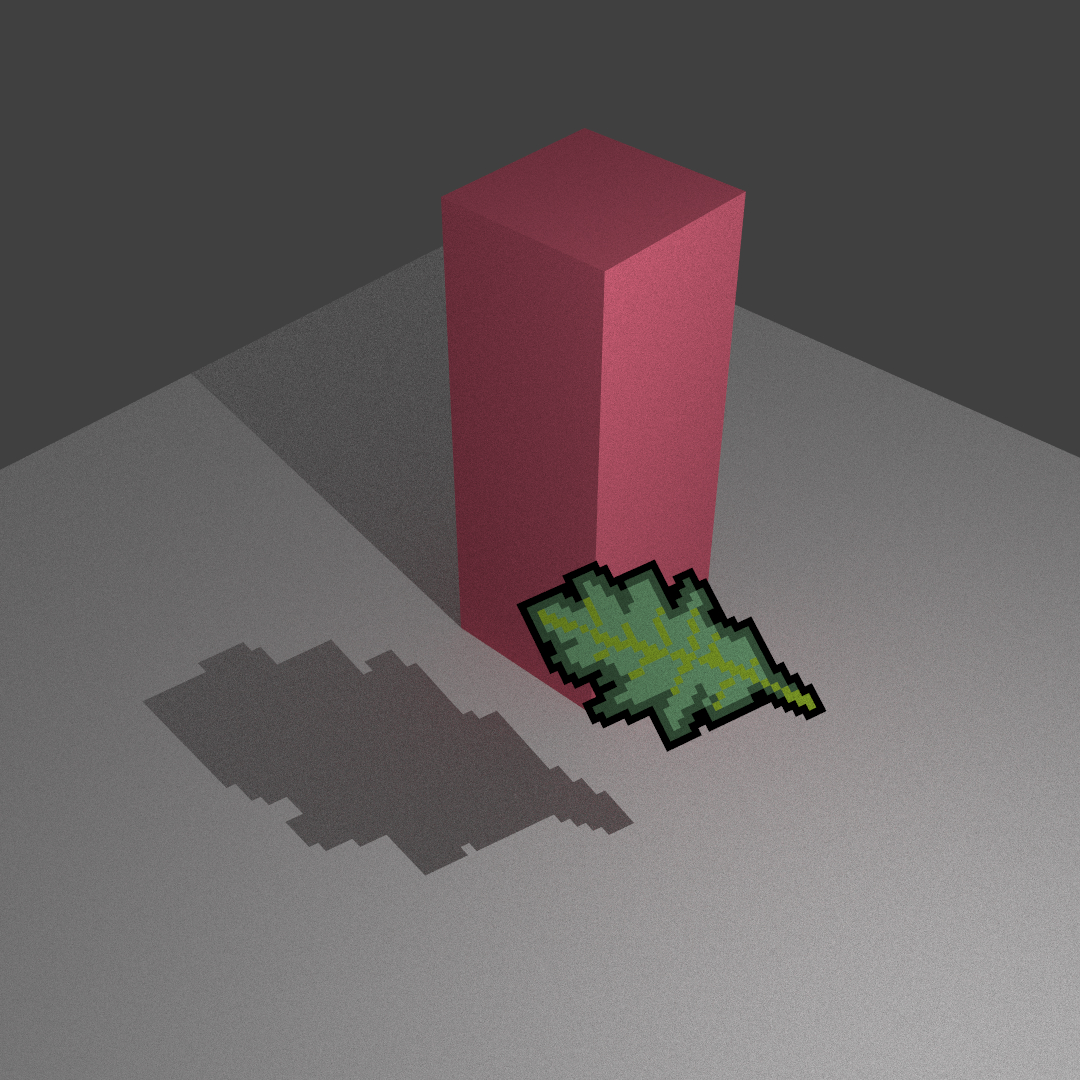
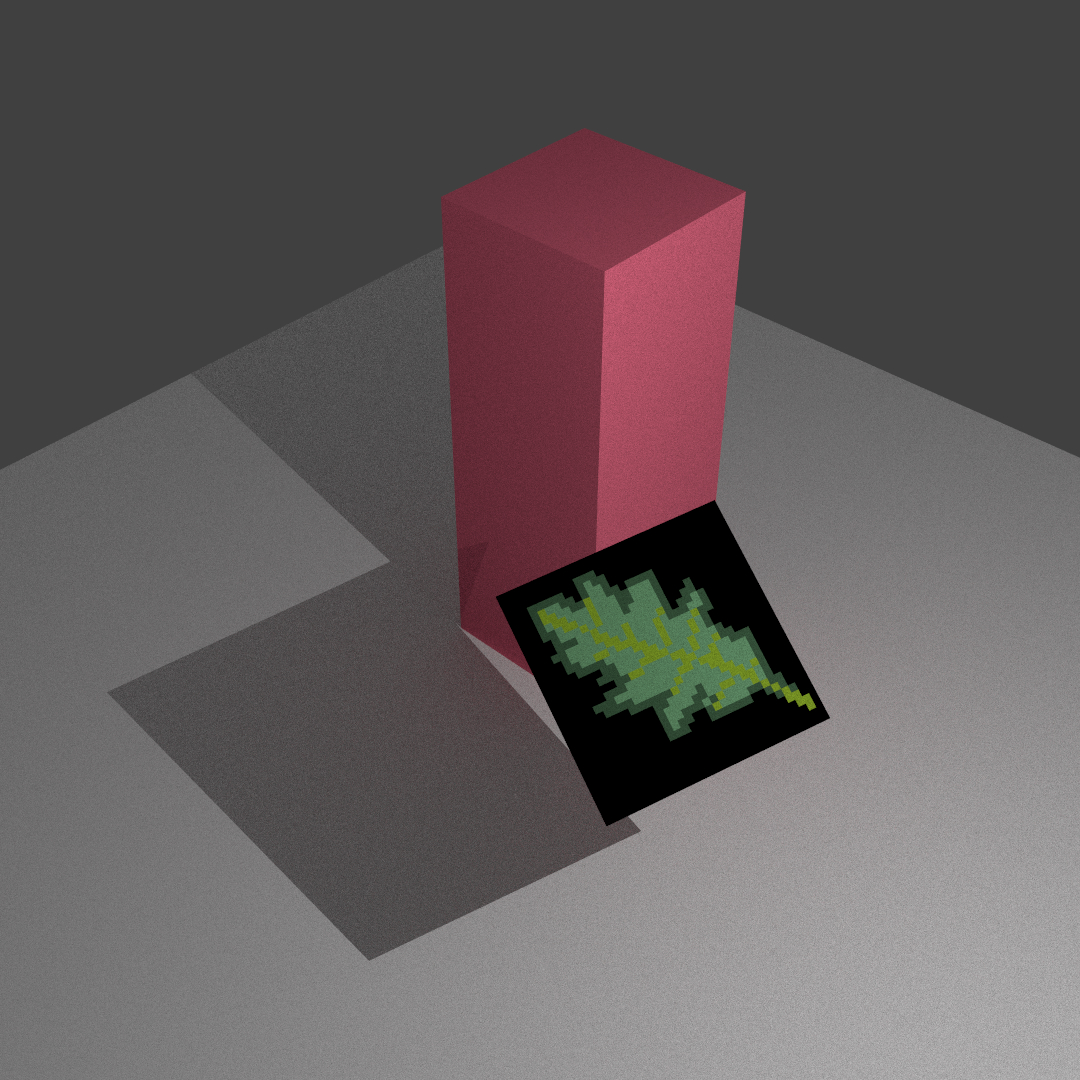
Alpha masking lets us use cheap geometry (e.g. a quad) to represent more complex objects by enabling the ray to travel through transparent pixels of our texture. This is often used for foliage, leaves, or other objects where rendering a large quantity of complex geometry would otherwise be required. If the pixel is not fully transparent, we can even model semitransparency by using the alpha value as the probability that the ray passes through.
Renderer Modifications
First of all, I had to access the alpha channel of the albedo texture (if it exists). For this the following files were modified: image.hpp and texture.hpp in include/lightwave (glue code/ getters/ vector of alpha values), image.cpp in src/core such that it loads and stores the alpha channel, and image.cpp in src/texture to add a "GetAlpha(Point2 uv)" method that handles border behavior (similar to "Color evaluate(const Point2 &uv)" ). The more complex modifications happened in instance.cpp and scene.cpp (src/core), where I modified the "intersect()" and "transmittance()" methods. The basic idea of the modifications is: Just do not count a ray hit as a hit if the ray hit a transparent pixel of the texture. This had to be done recursively until the ray leaves the scene or hits a solid texture. Otherwise we would not be able to render multiple meshes with transparent textures behind each other, or even a single opaque mesh behind a transparent one correctly. Our transmittance function in scene.cpp had to be adjusted to support this as well. We also have to pay attention to how our shadow rays work, as a transparent texture will not obstruct the path to a light source, even when the ray hit the mesh. We do recursive checking here again because the ray can hit multiple transparent textured meshes and has to pass through all of them.
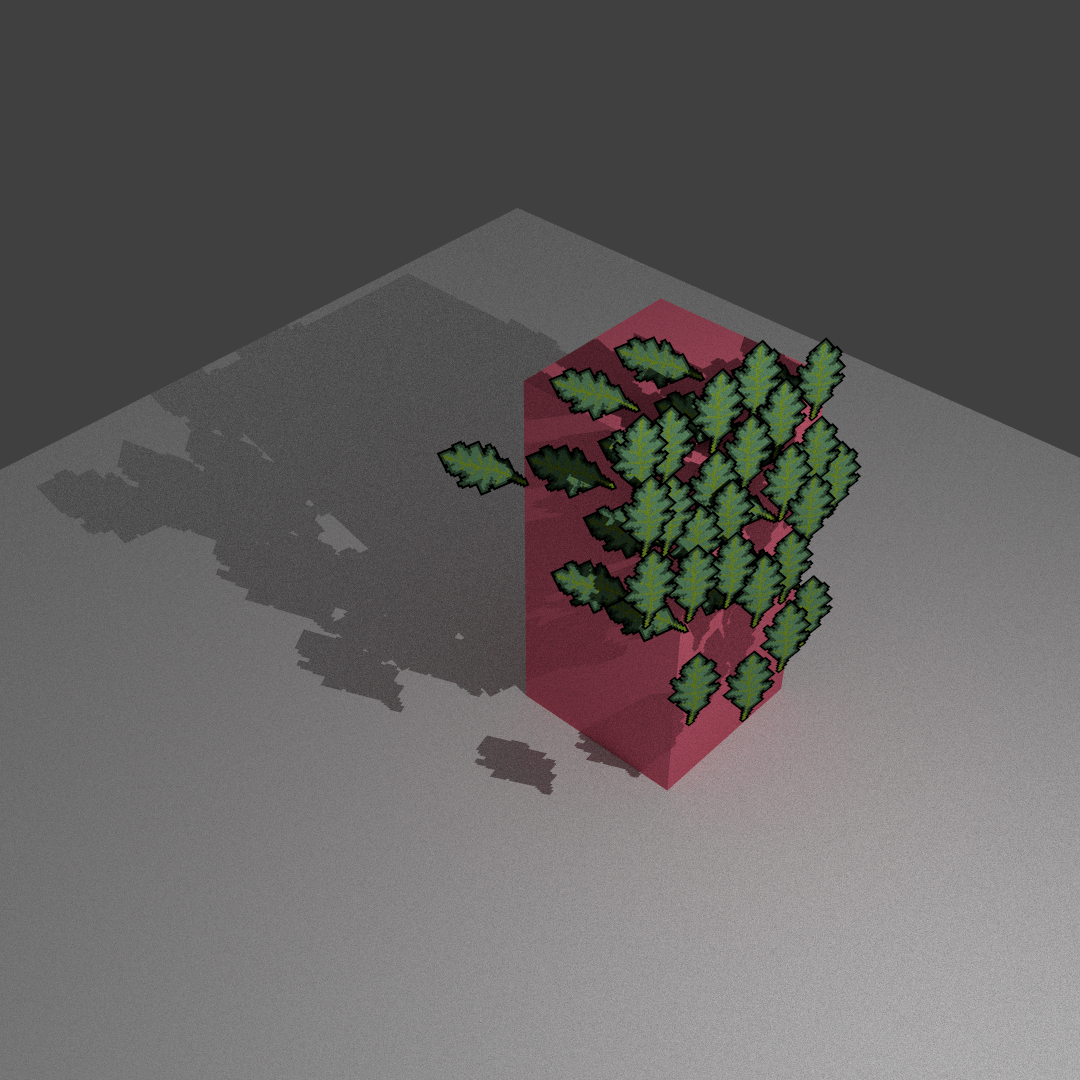
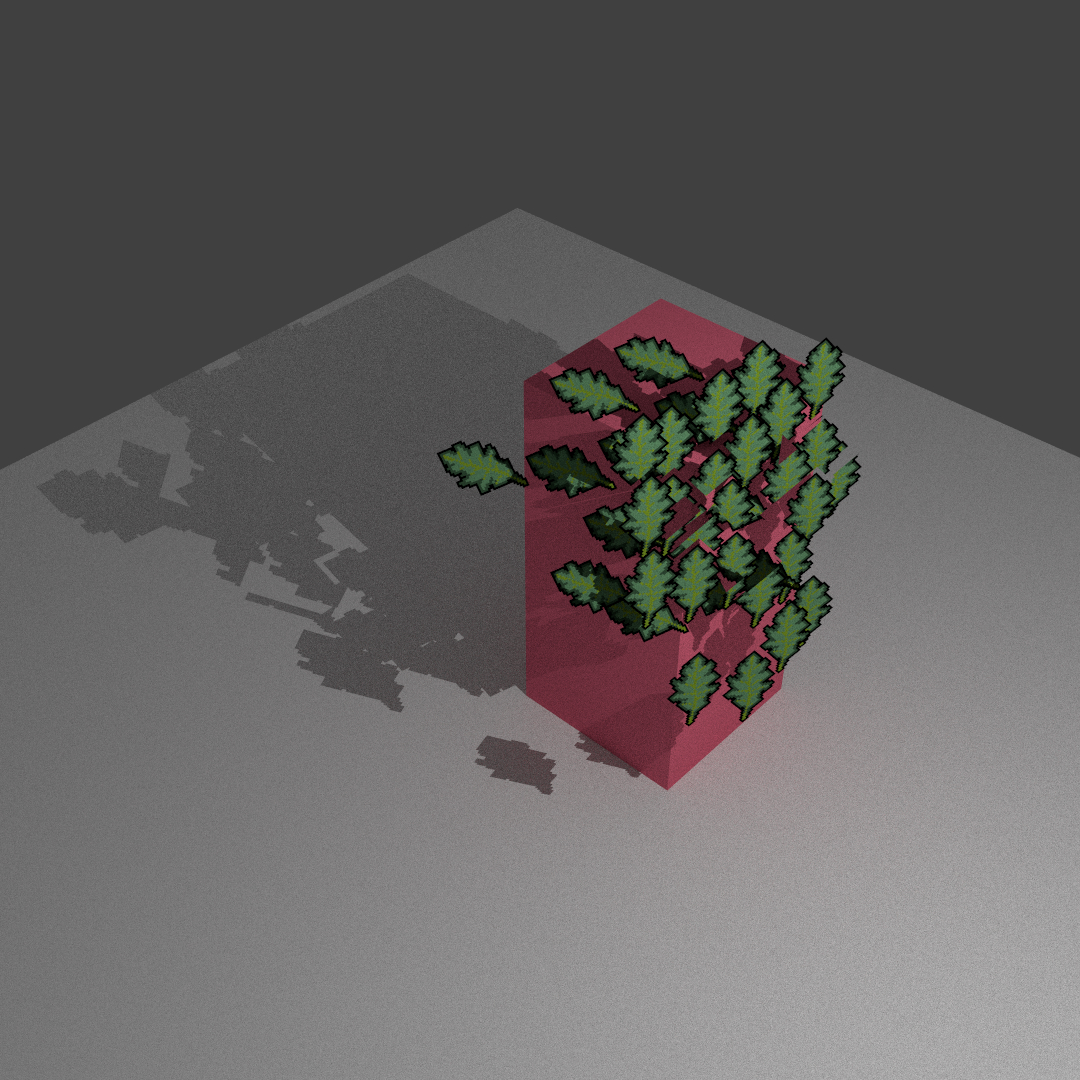
See how some leaves on the right image are clipped and the shadows are incorrect if we do not do this recursively:
Challenges
The most frustrating part of implementing this feature was fighting the framework. I did not fully understand how to access/store the alpha values or images. I think my solution is overly convoluted, as I add "ref name="alpha" id="Image Texture_001" manually to the xml file instead of just using the alpha channel of the albedo texture/color directly if it has an alpha channel. There has to be a better way to do this, but I focused on making the feature work rather than making the code elegant (at least for this project) due to time constraints. Besides that, I was not really aware that the intersection logic had to be recursive at first, this created very weird renders where the pixels behind transparent parts were wrong (see images above). The feature was very easy to understand, but surprisingly complex to implement.
Post Processing: Bloom
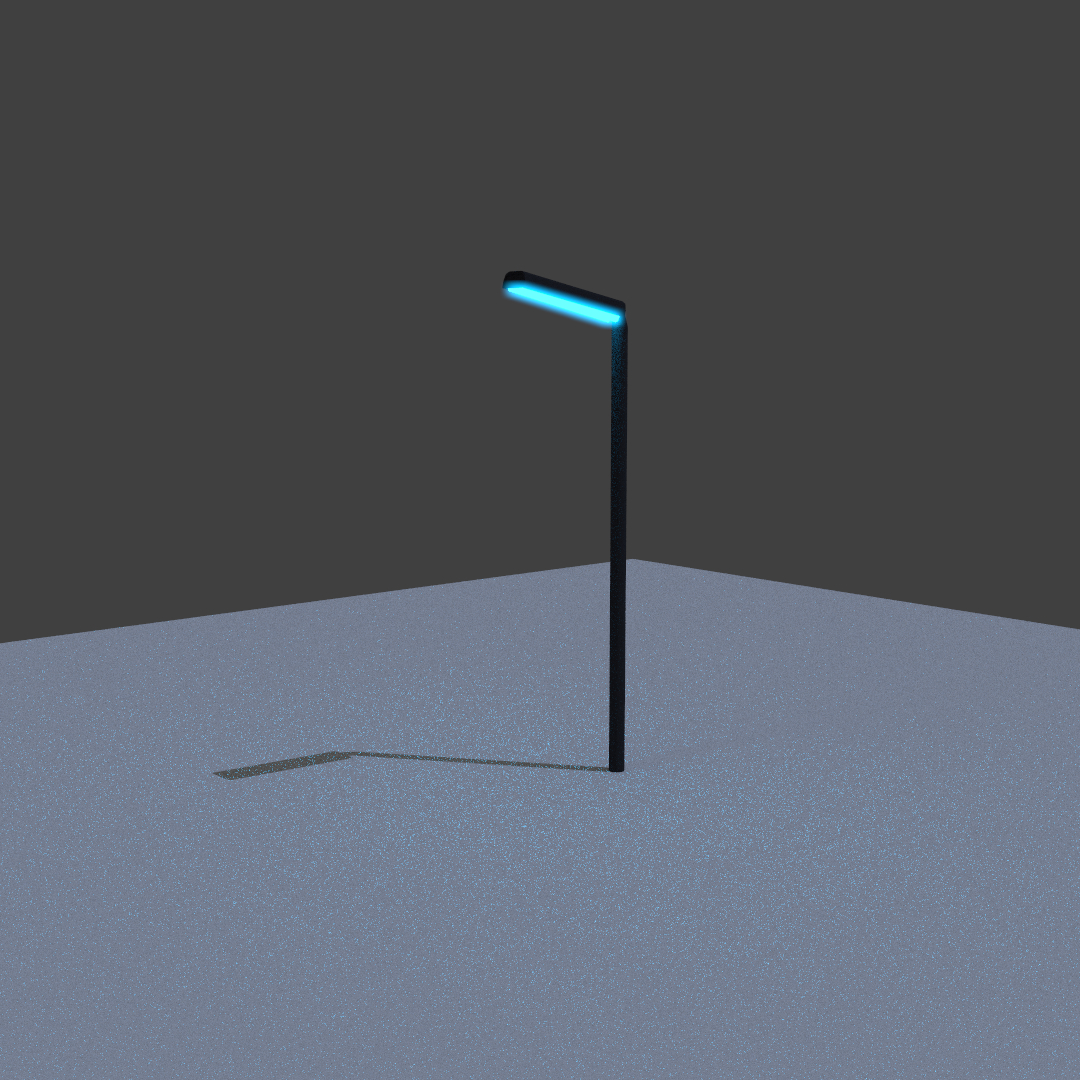
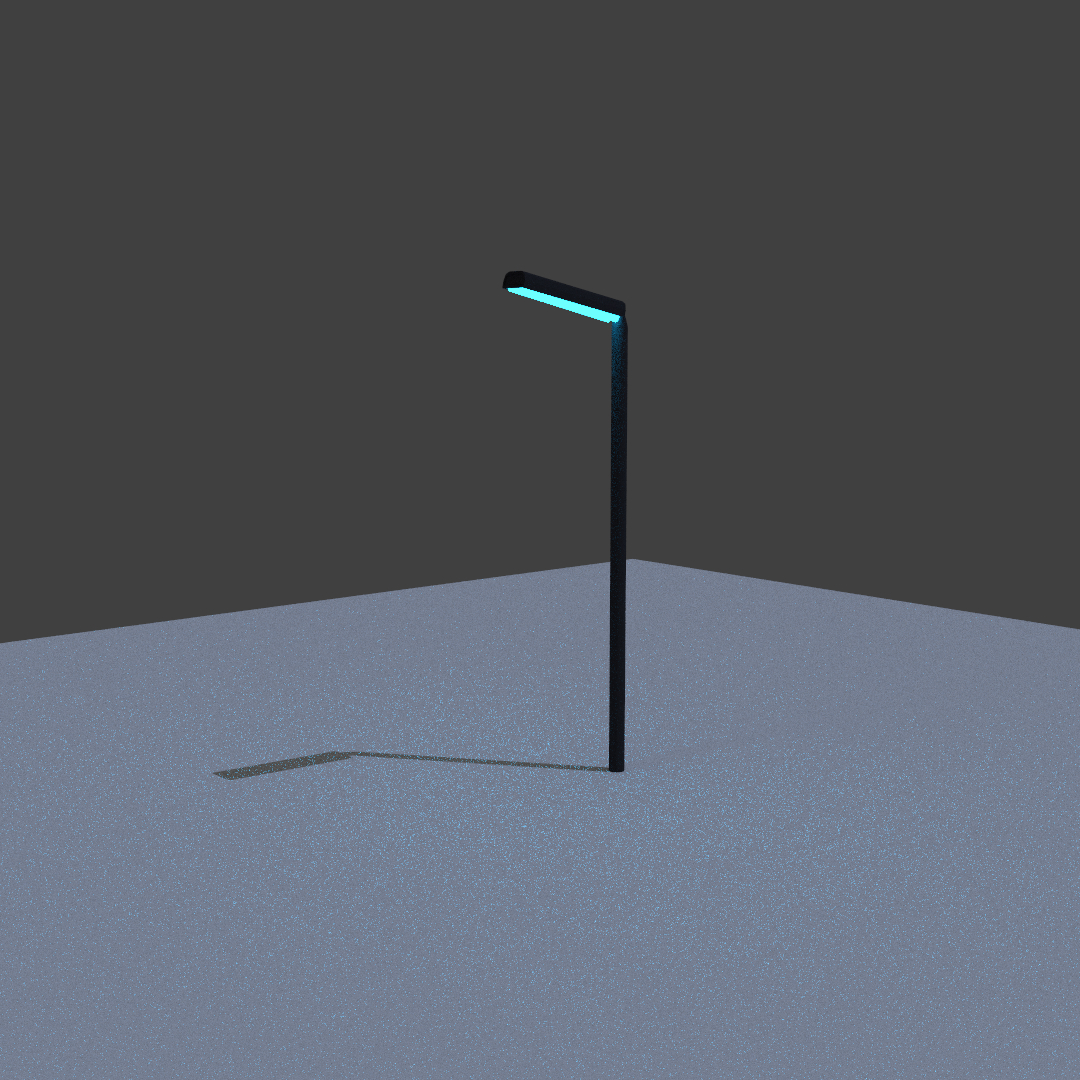
Bloom is a surprisingly simple effect, that when not overdone, can create really nice soft glow around bright light sources. It is a post-processing effect that extracts the bright parts of the image, blurs them, then composits the blurred result back over the original image.
Renderer Modifications
This was probably the easiest feature to implement. I just had to create a new post-process very similar to the already implemented tonemap.cpp and operate on pixel color values. Find the brightest parts of the image using a threshold, then do a horizontal followed by a vertical gaussian blur on the isolated brightest parts, then add this to the original image. I also added the parameters "threshold", "intensity" and "radius" to tweak the effect.
Challenges
There was not really a big challenge here as I already knew the effect and just had to figure out how to implement it in the framework. The only challenge was to understand how to edit the xml file to actually apply it to my rendered image. After reading a helpful forum post and guessing the missing parts from error messages, it finally worked.
Normal Mapping
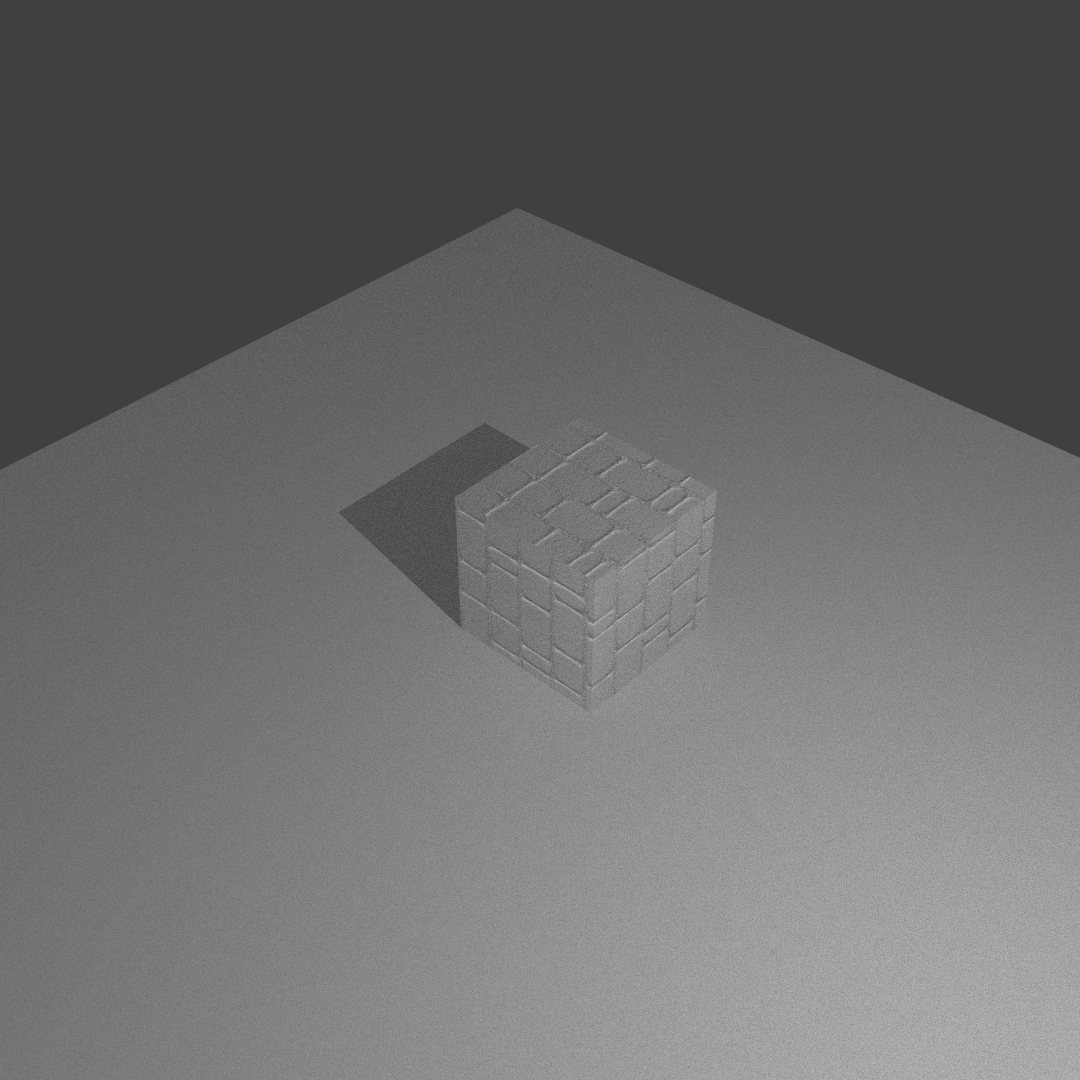
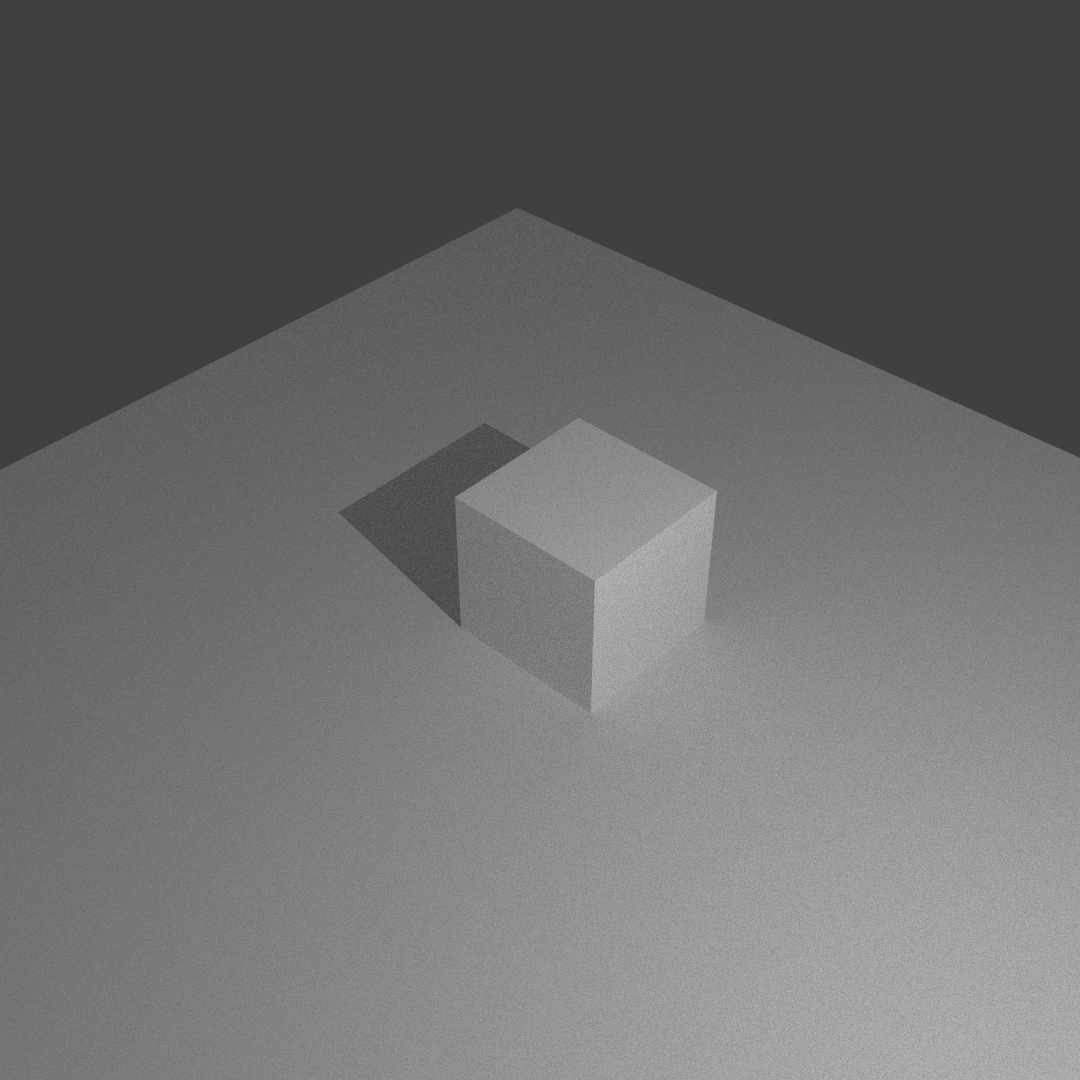
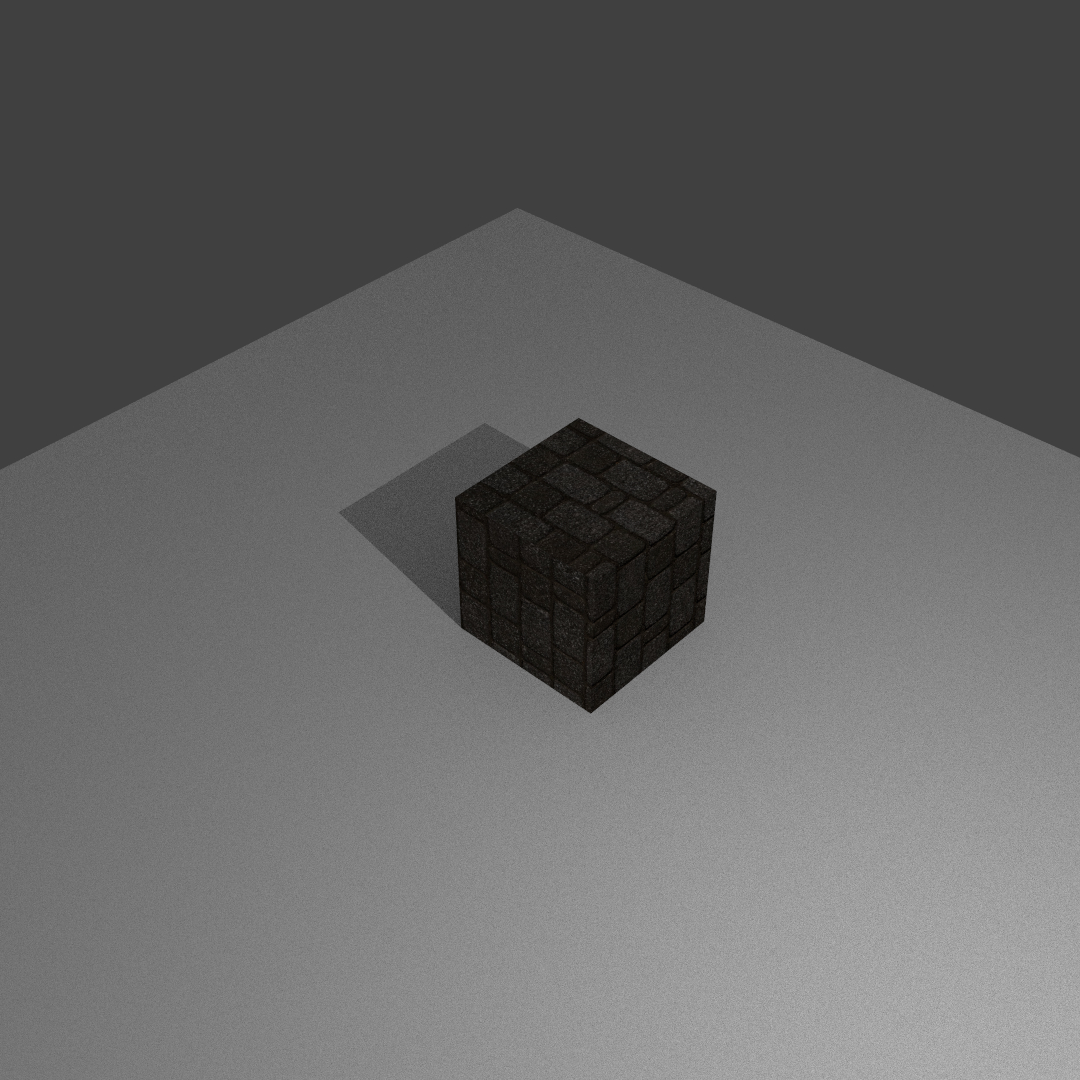
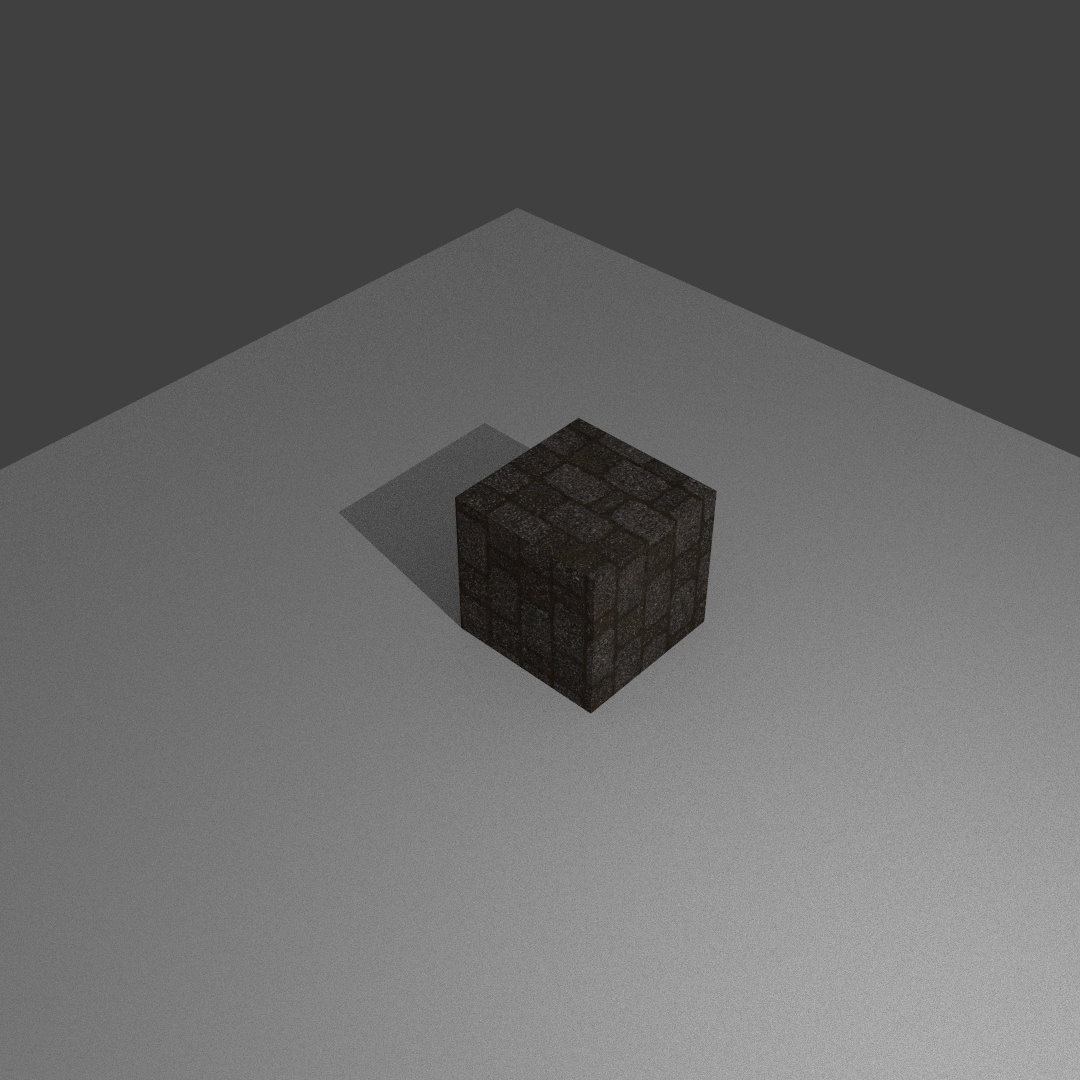
Normal mapping is also a very impactful effect that can make a mesh look much more detailed without having to add more geometry. This is much cheaper to render than if we added a million more triangles to add that detail. The idea is that we do not use the normals of the mesh geometry for rendering, but a dedicated normal texture instead. This way we can dictate how light bounces off the mesh and "fake" detail. This can be used with almost every texture and will make it look way more realistic without a significant performance drop.
Renderer Modifications
I added a new texture "m_normal" to instance.hpp and if that texture exists, I overwrite the geometry normals with the values stored in that texture (in instance.cpp). Note that the values have to be remapped from [0,1] range to [-1,1] range, otherwise the normals will be incorrect.
Challenges
At this point I was better at understanding how to deal with textures in lightwave and the xml file, so this was rather straightforward. But I still managed to introduce a mistake that made the normal map texture load correctly, but its reference was always null when I was overwriting the geometry normal. The annoying issue was in the xml file, my code expected the normalmap-tag to be declared at instance level and not next to baseColor or roughness... Shifting the line one line down so it was declared in the right scope fixed the issue. Otherwise this was a surprisingly easy feature to implement in comparison to the image quality improvement it enables. When I started working on my final render, I noticed that the normal map seemed very stretched on my meshes, there is probably still an issue with the way scaling works. I am not sure if the issue originates in my implementation or in the way I have set up my textures in blender...
Denoising
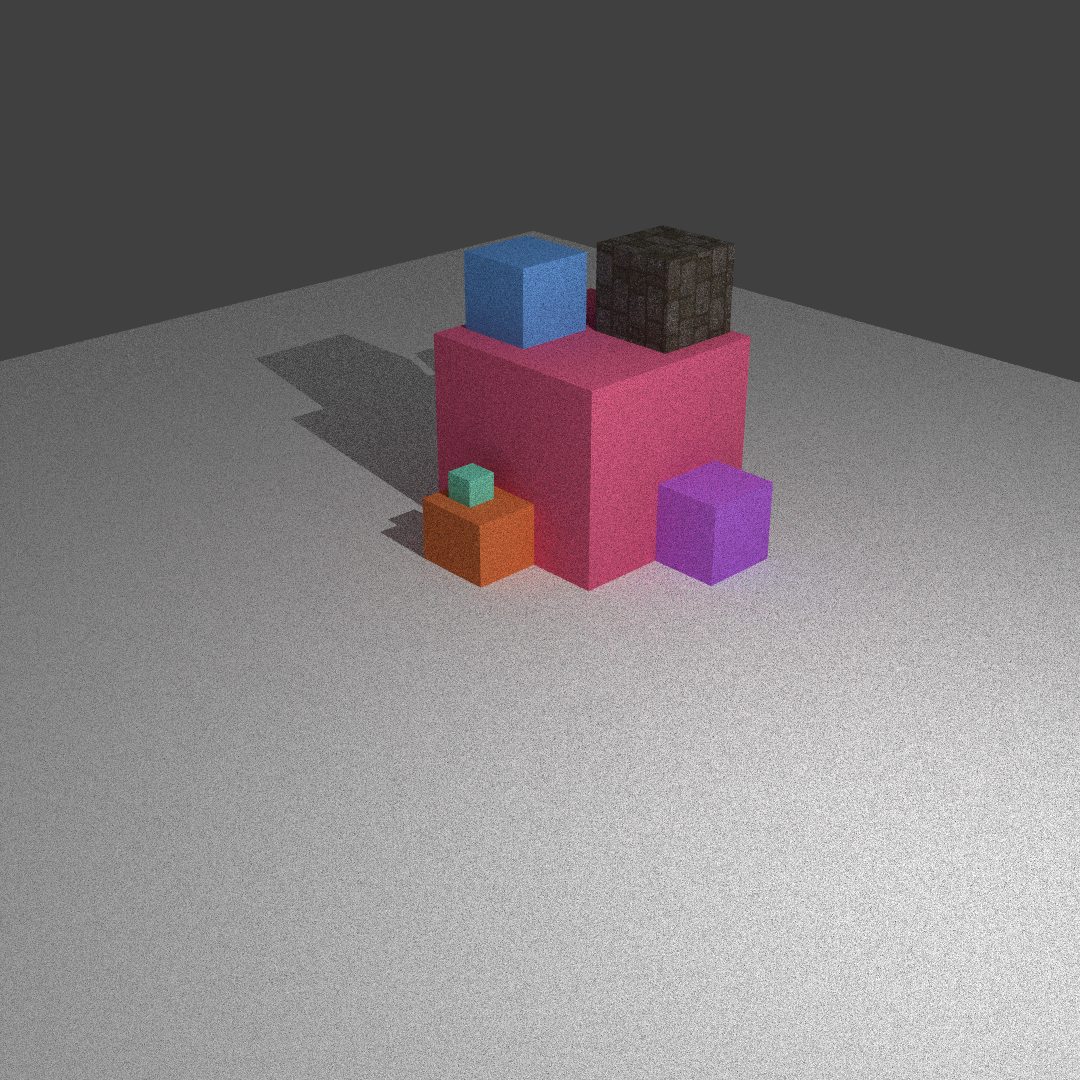
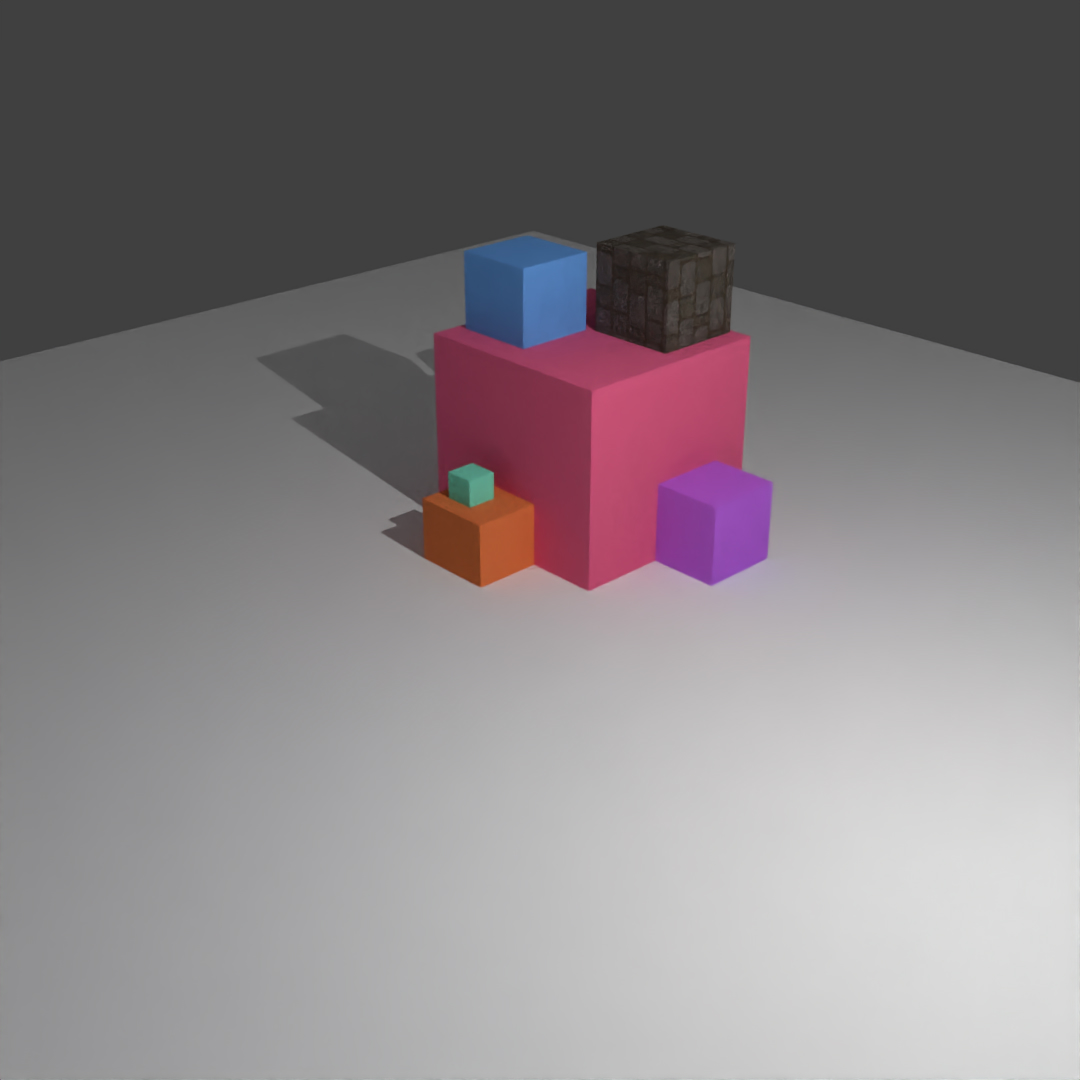
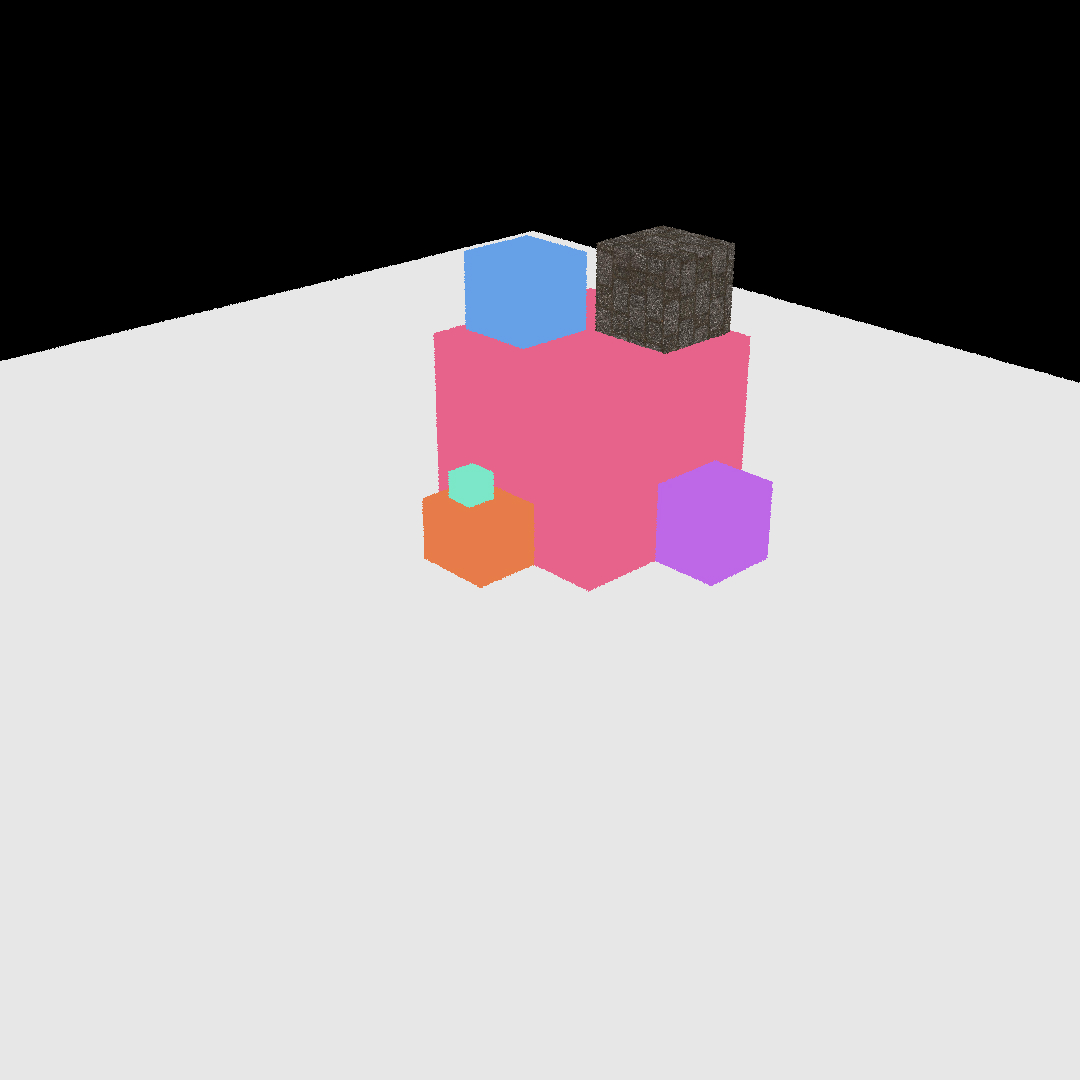
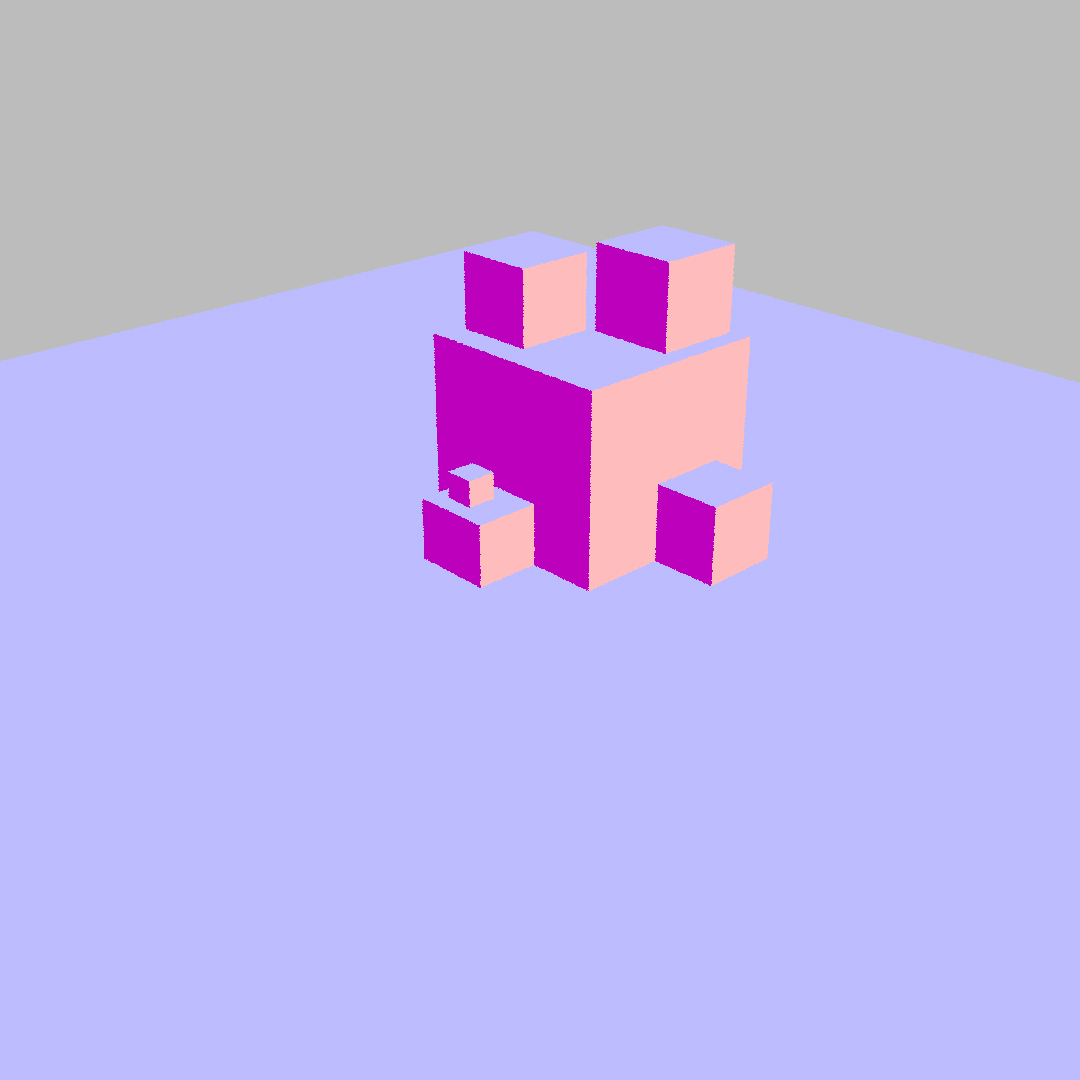
Denoising is a post-process effect used to achieve high quality renders with low sample counts. It works by smoothing out detail where monte carlo sampling produces noise. We are using intels OIDN library for denoising and provide an additional albedo texture and normal texture (of the scene) to improve results.
Renderer Modifications
As denoising is just another post process, I just had to find out how to integrate the library in CMakefile.txt. After a few tries I got something that compiled, but adding dependencies was not an ejoyable experience in C++. Using the library was fairly straight forward, just a few conversions from lightwaves format to the libraries format were necessarry. To provide the albedo map, I had to modify many files and add methods that just simply return the albedo color without lighting and implement an integrator for it, similar to the normal integrator that already exists.
Challenges
CMakefile.txt is a place I do not want to spend much time at. I was very happy when the dependency worked and file paths were correct. Also adding the albedo integrator was slightly annoying as many files had to be adjusted with glue code and the "getAlbedo()" method. Besides these points, the OIDN library took care of the difficult parts. I am sure there are many ways the filters and settings of OIDN could be adjusted to achieve even better results, but as I was satisfied with the results I did not see the advantage of tweaking settings further.